Previous, Crash Test Dummies (users and groups) | Next, Graph API the easy way (python code)
Clueless at the Portal - My First App Registration
You like clicking stuff, right?!

This is a step-by-step guide to every click that you need to configure your first application registration in the Azure portal.
You'll configure permissions for your application to read user and group information from Entra ID, using the Graph API.
You need to have already signed up for an Azure tenant, and have superuser access, but otherwise you don't need to have configured anything.
Create an application registration
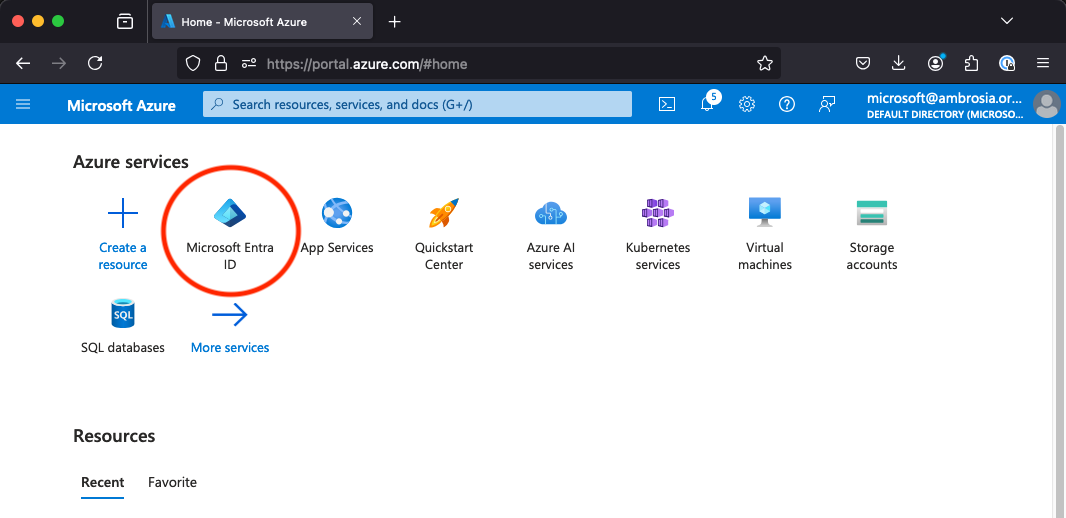
Start by logging in to your tenant in the Portal. Then click "Entra ID" to go to the Entra ID home page for your tenant.
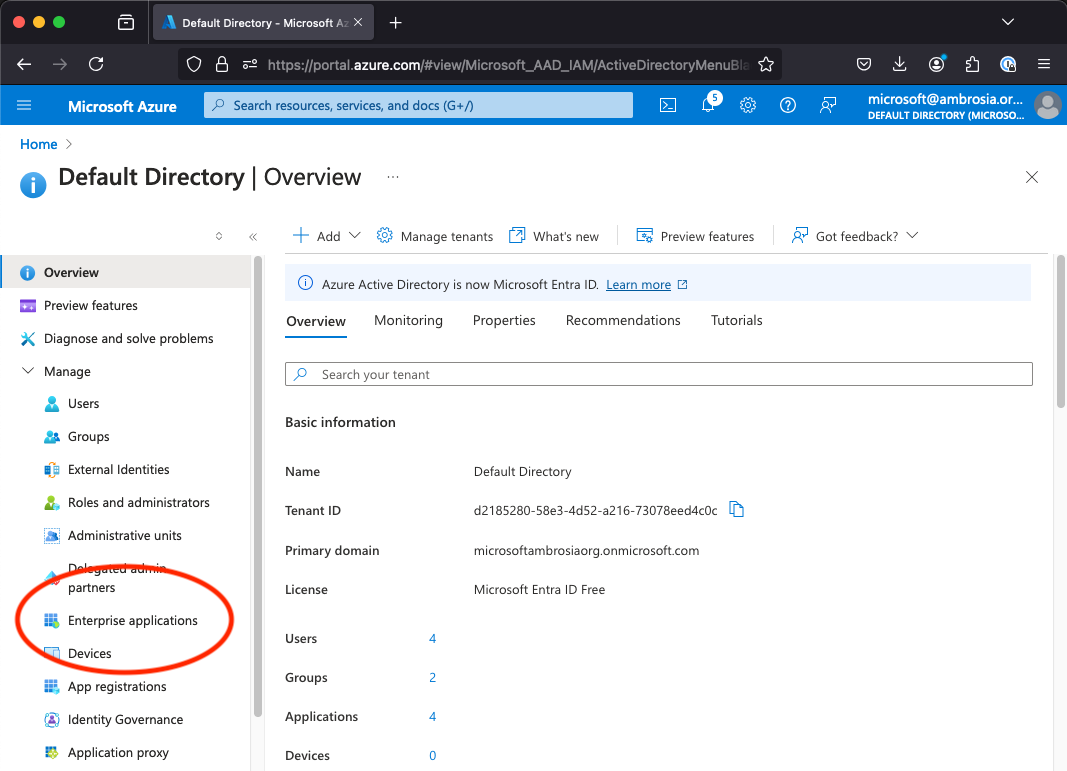
Take a look at the menu on the left hand side of the screen here.
These are collapsible options, with lots of thing hiding inside them.
If you can't see "Enterprise Applications" on the left-hand-side menu, click on the word "Manage" to expand all of the sub-options.
Now, it turns out that some of the stuff you want to do is under "Enterprise Applications" and some of it is under "App Registrations".
Just take a moment and feel the zen of the world with me. Don't worry about why there are two different places for this, just be still and know it is thus. Remember, you are a peaceful fluffy cloud.
So, from the left-hand menu, click "Enterprise Applications".
Once there, click "New Application".
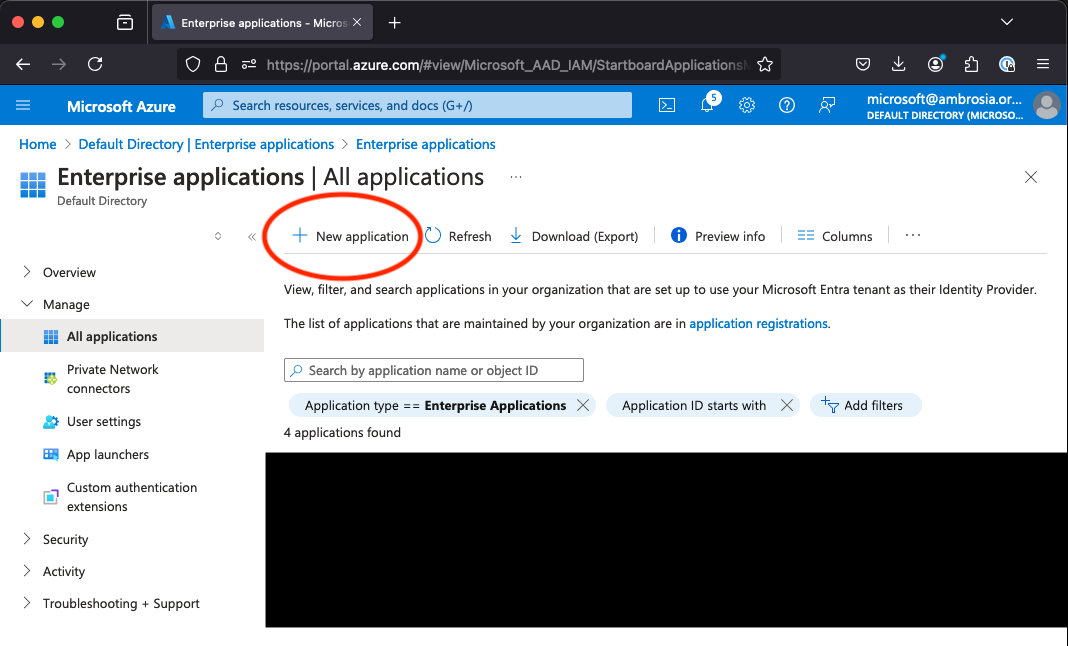
We want to be able to write our own application rather than picking one from the shelf, so click "Create your own application".
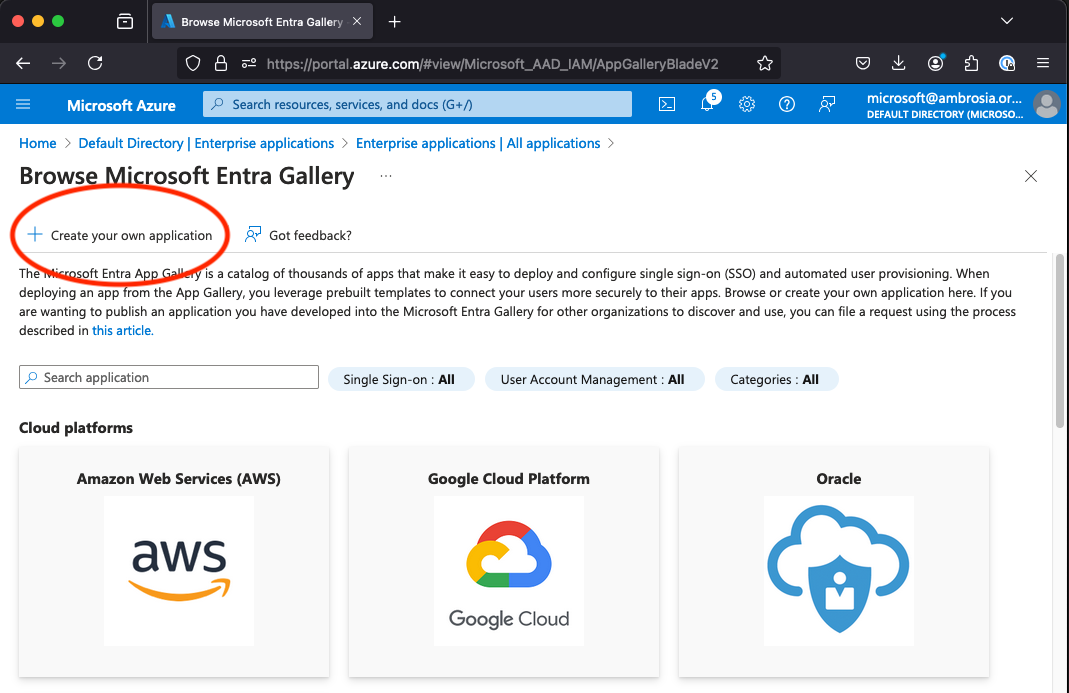
Now give your app a descriptive name and once again confirm that you don't want anything to do with the "Gallery".
(Does the middle option do something useful? Who knows, I didn't click it! We end up getting where we need to be by selecting the bottom option from the list here, "Integrate any other application...". )
I called my app "asdf".

Click "Create". You will be taken to the home page of your new Enterprise Application.
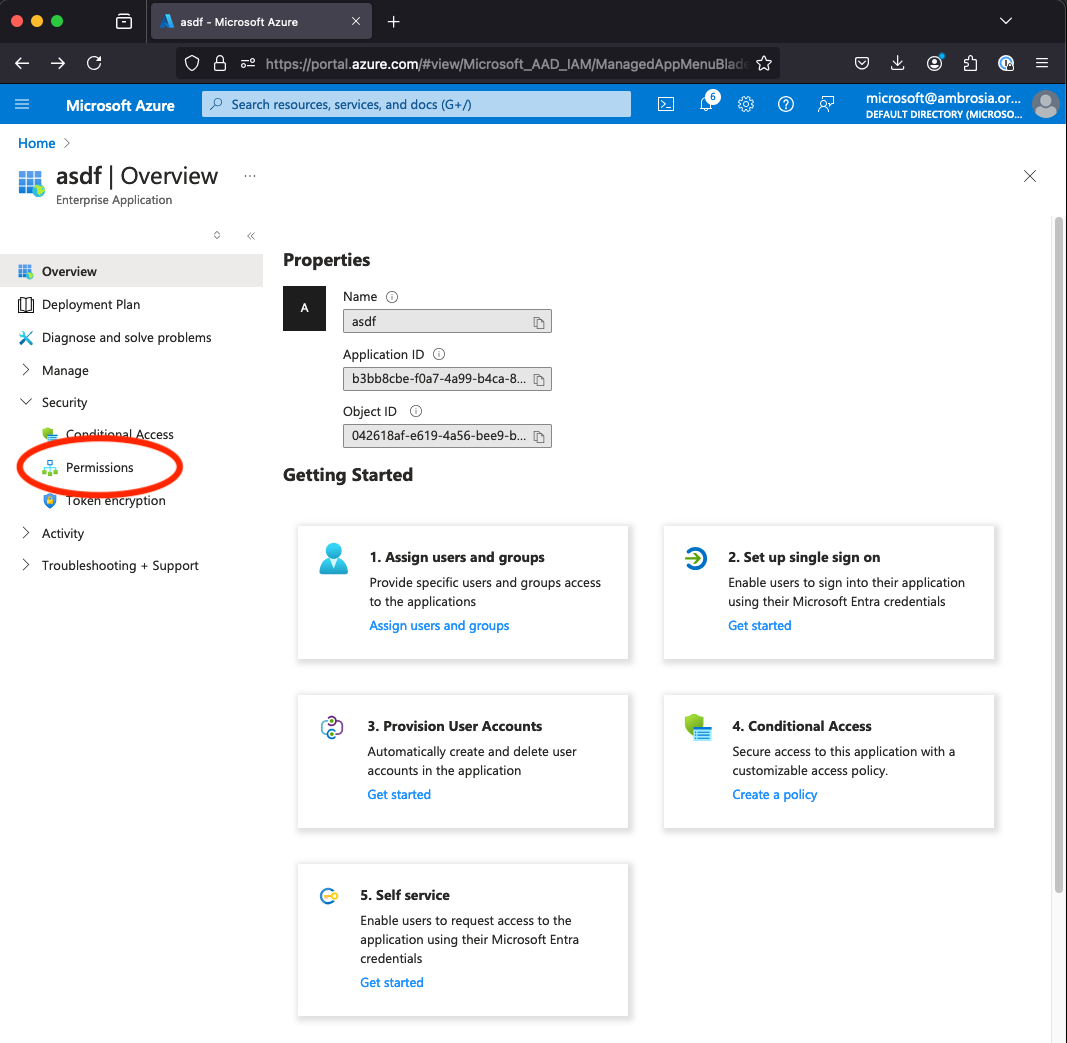
Add application permissions
Now you need to set some permissions to allow the application to interrogate our Entra ID.
The permissions that you will need in order to read all information about users and groups are sensibly called:
- User.Read.All
- Group.Read.All
I'll walk you through the process of adding the User.Read.All permission. You can then repeat the same process to add Group.Read.All in the same way.
Start by clicking "Permissions".
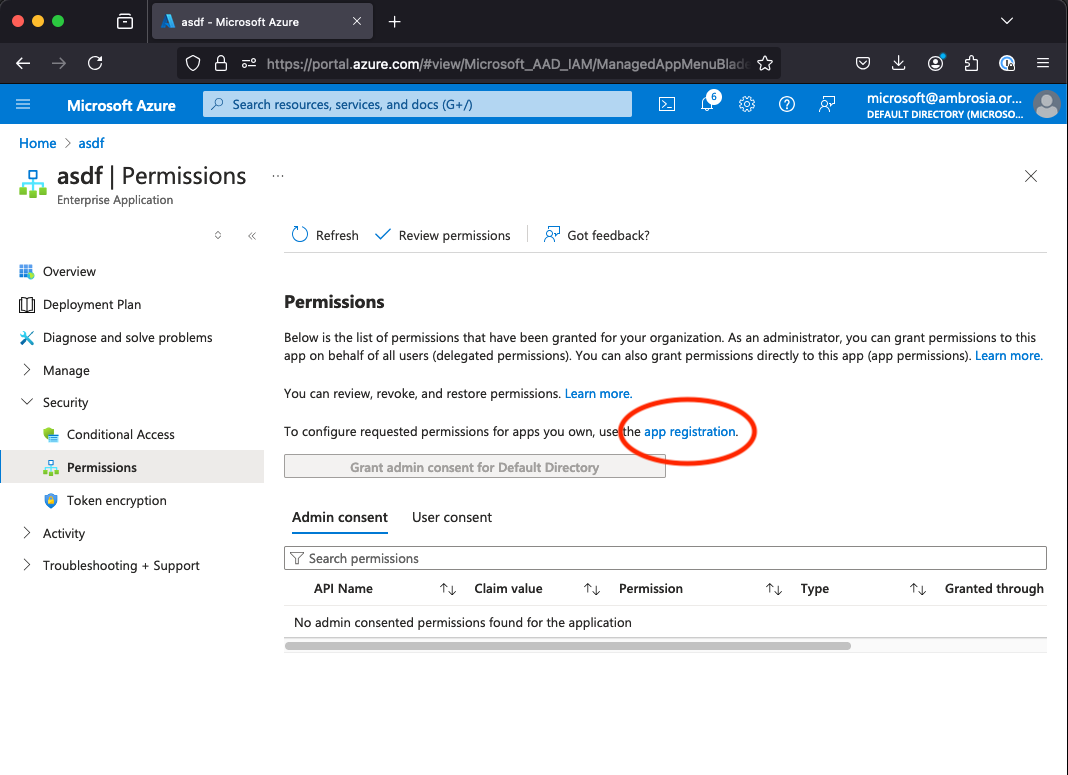
Amusingly, this takes you to a page that explains that you can't do what you want here.
Instead you need to click a link that will take you to the permissions section of "App Registration".
So, click that, as the Portal instructs!
You are a cloud.
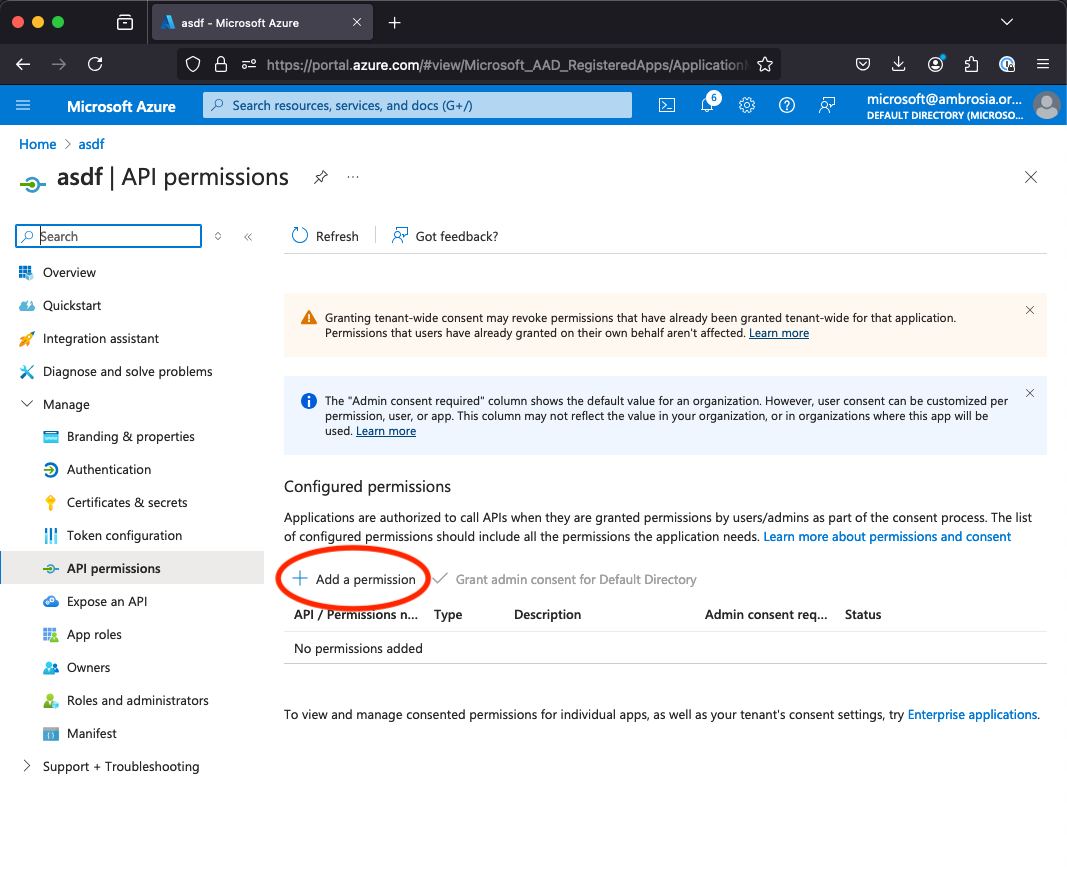
Finally the good stuff. Azure has been helpful and sent you to a place called "API Permissions" within an "App Registration" that corresponds to the "Enterprise Application" that you just created.
It even has the same name as your Enterprise Application!
You're going to add permissions to read information about Entra ID Users and Groups.
So click "Add a permission"
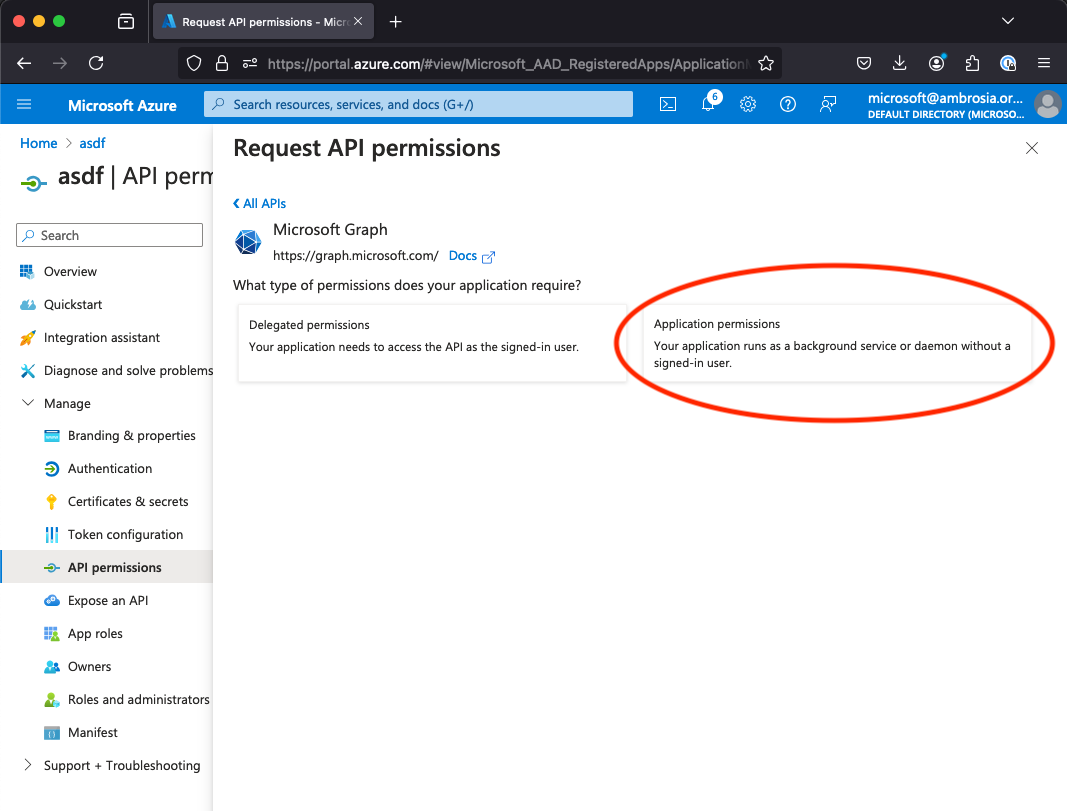
Ignore all options, click the big "Graph" button at the top.
Do not be distracted. We only ever care about Graph.
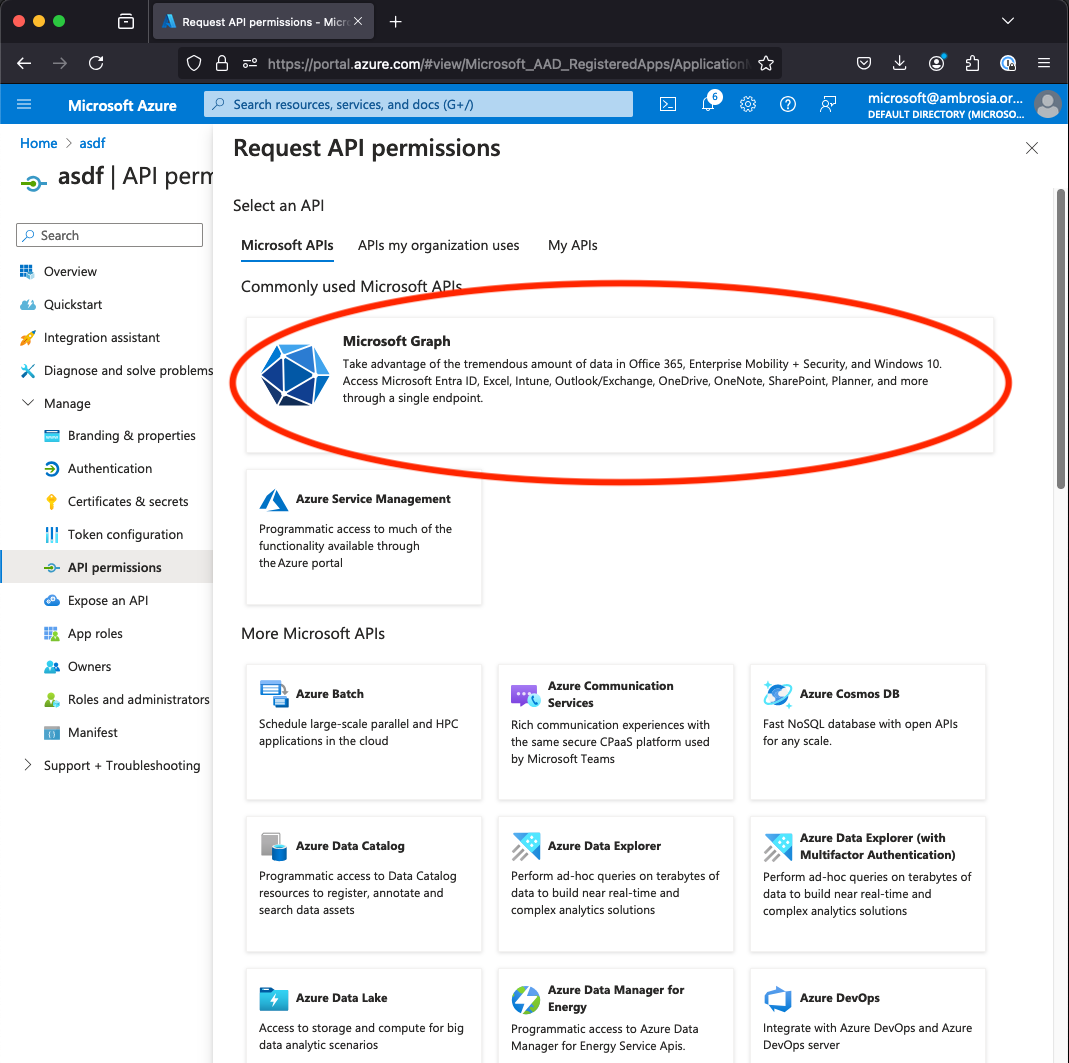
Again, Microsoft attempts to distract you.
Do not worry about delegated permissions right now. All you need to know is that you don't want them.
Select "Application permissions".
(Basically, if you don't select "Application" here, you'll only be able to act on behalf of some other user that's logged in some other way. What other way? Who knows?! For the Classic API Experience that we know and love, select Application. Don't come crying to me later if you don't select "Application" here. You know what you did.)
Cool, you avoided most of the obvious the traps. Halfway there with the clicking.
Now you've exposed a list of possible permissions, that you can search for the particular permissions you want.

Click in the search box and start typing "user.". When you see "User.Read.All" check the box next to it and click "Add Permission".
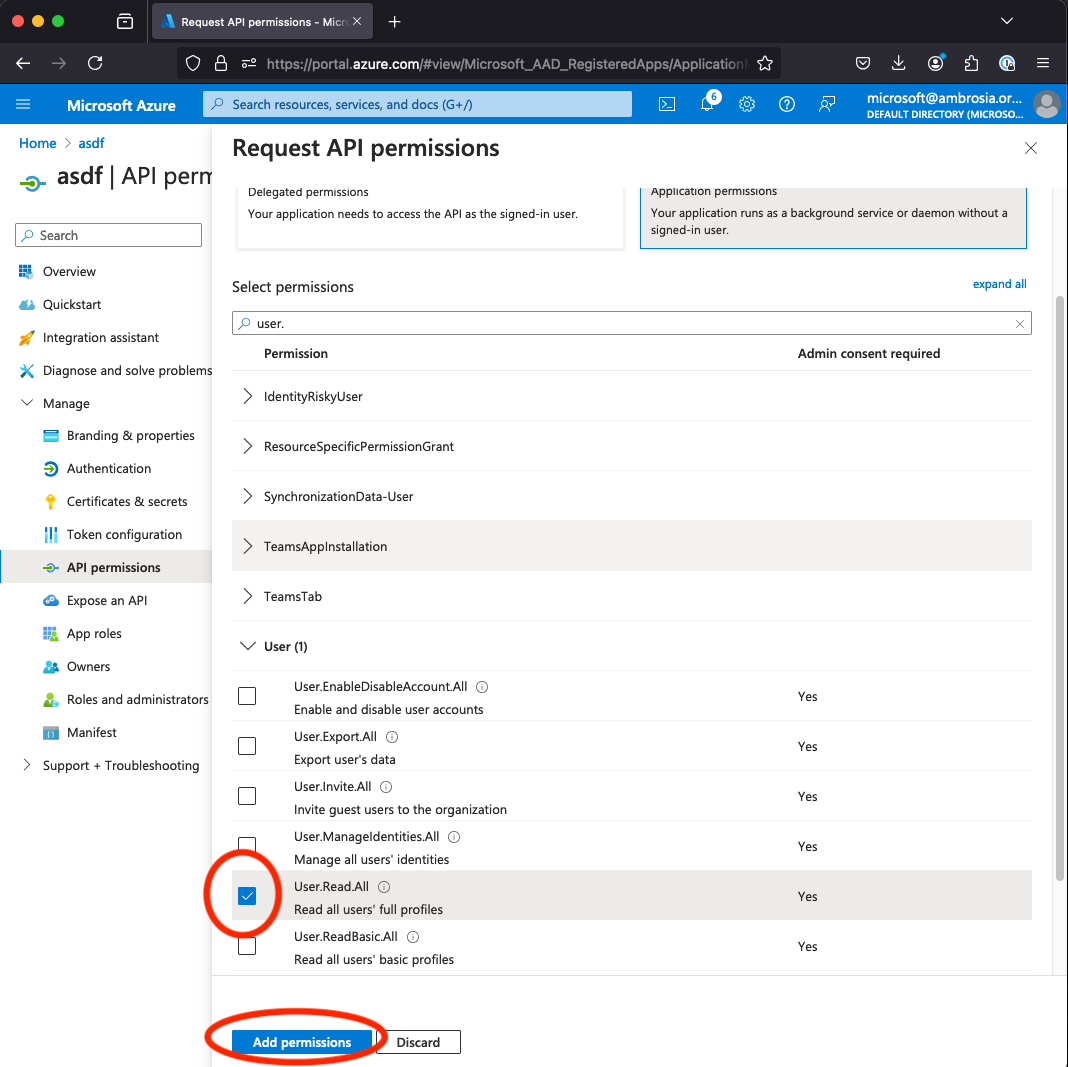
That didn't actually add the permission of course, that would have been too easy.
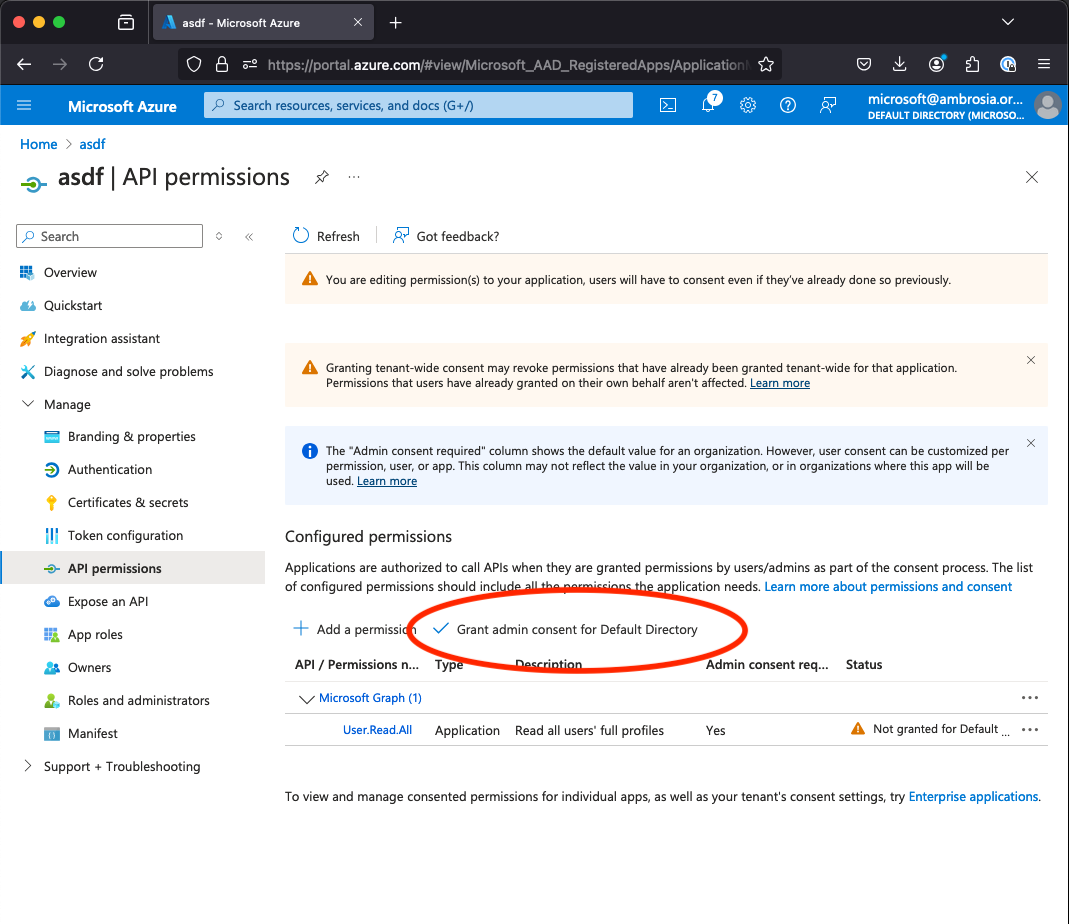
You have now reached the dark heart of this process, a web page so fiendish that even the most insane minds in the darkest sub-basements of Microsoft HQ would melt if they tried to comprehend it.
If you want to try and understand what you are looking at, take your time.
Your character will lose 1d6 sanity points.
When you're done, click "Grant admin consent for Default Directory".
You are a beautiful cloud.
Some kind of dire warning is displayed, presumably as a way of decorating the web page. Whatever it's asking, you're fine with it. Click the button to dismiss the decoration, labelled "Yes".
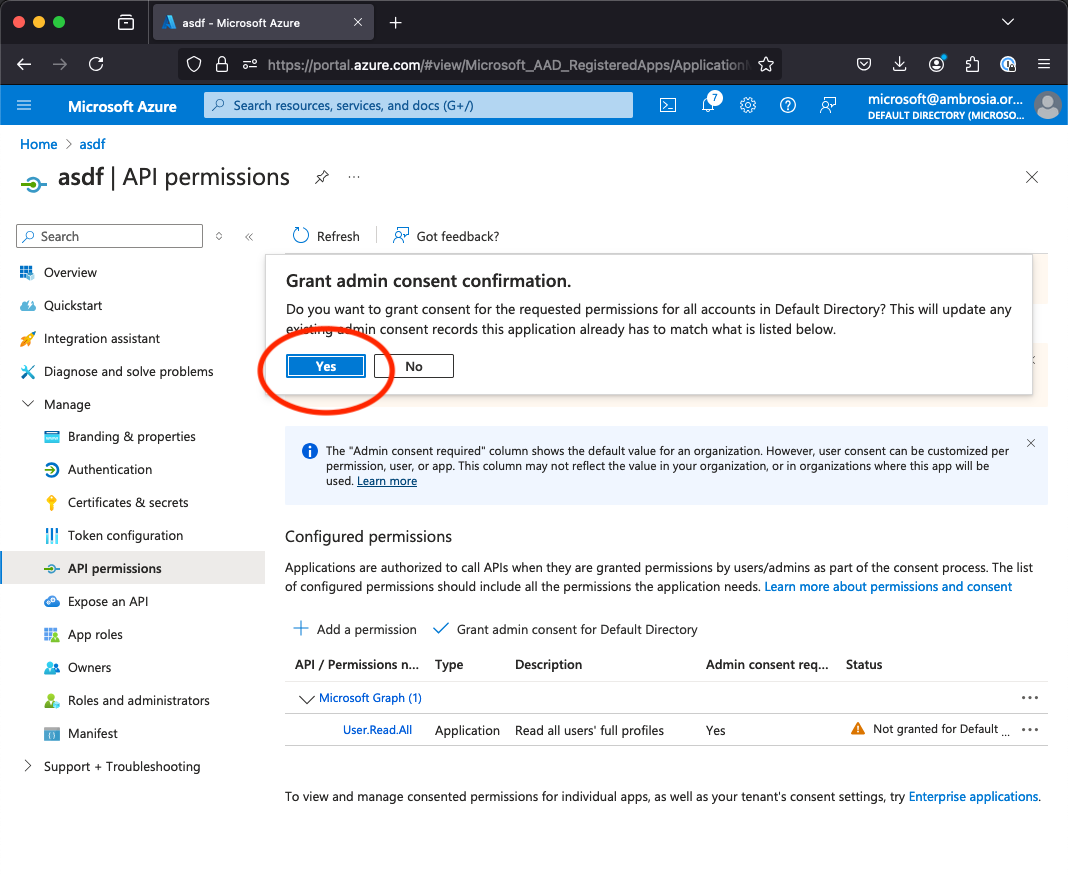
Now, and only now, the permission is added.
Repeat this process to add the Group.Read.All permission.
Create a client secret
I guess we're done with that so it's time to create a client secret.
Go back to the Entra ID home, then to App Registrations (NOT Enterprise Applications!). If you don't see a list of applications, click "View all applications in the directory".
Click your application from the list to go to that application's home page (so you're at the same place you were before you started adding permissions).
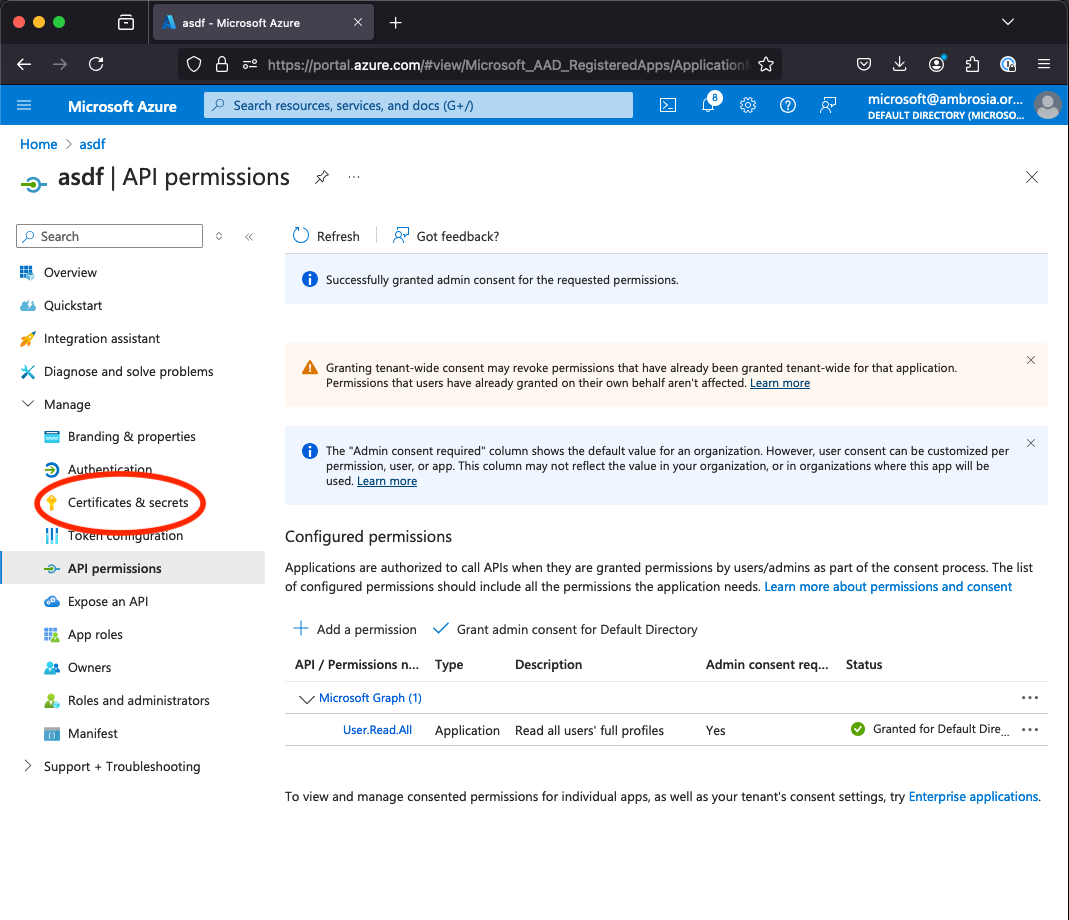
From the same left-hand-side menu that contains "API permissions" (under "Manage") instead find the option for "Certificates & secrets" and click that.
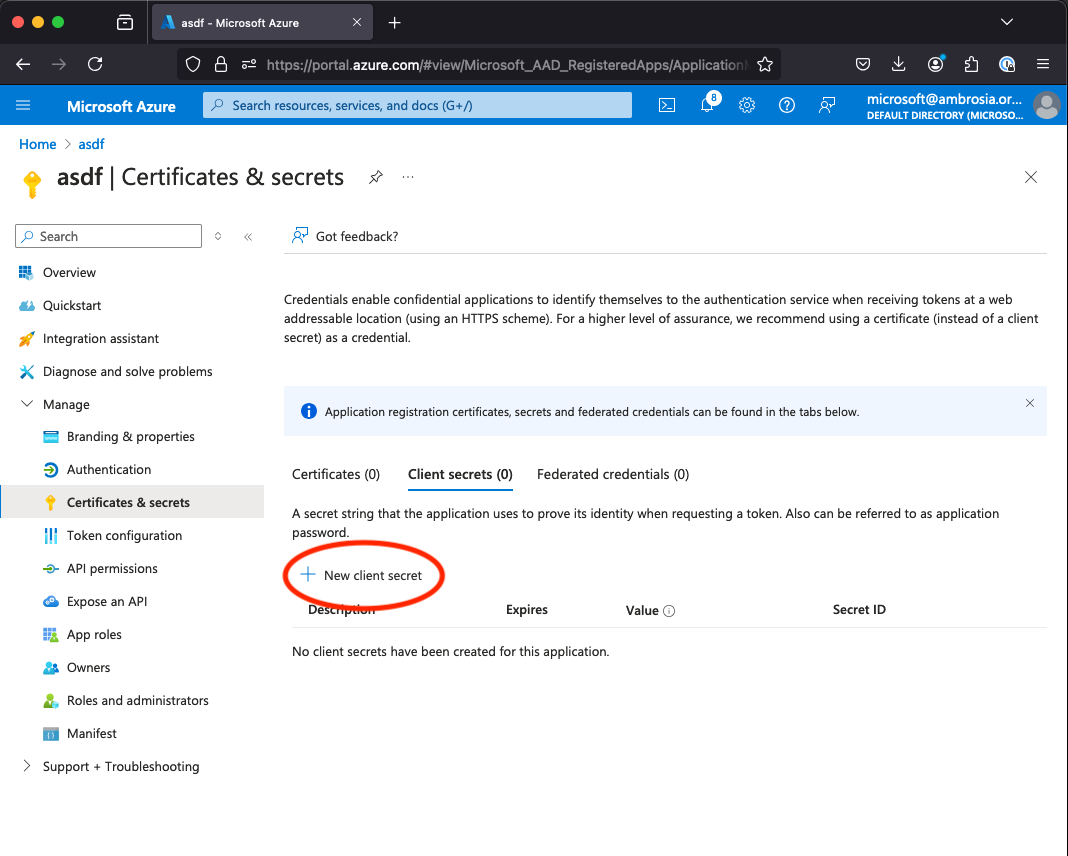
Select the "Client secrets" tab and click the "New client secret" button.
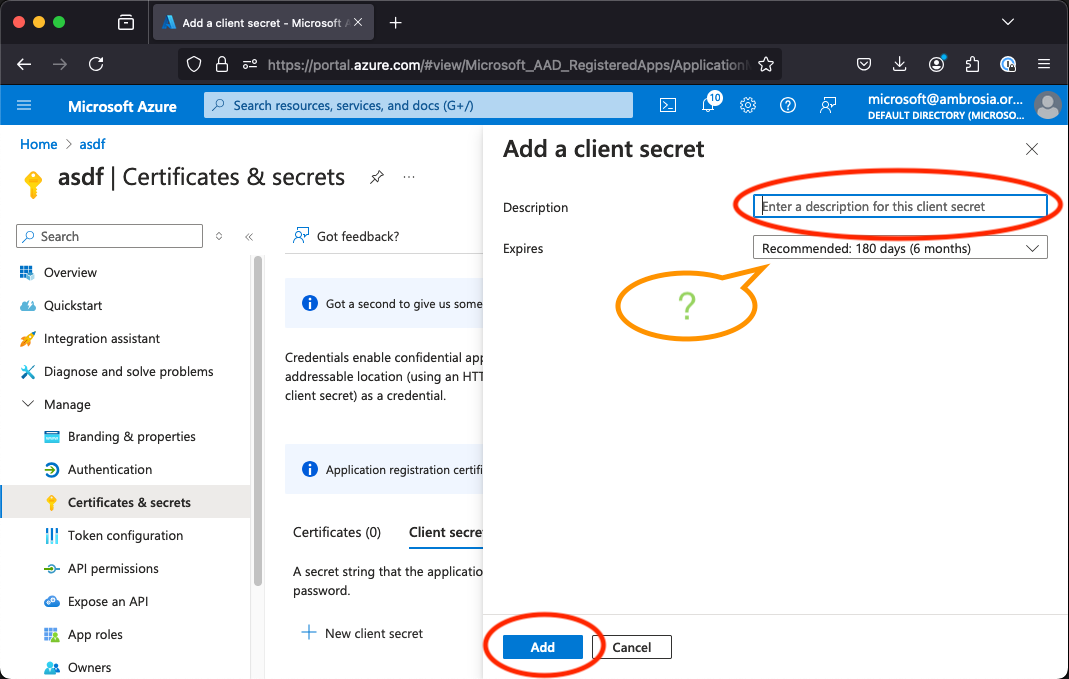
This will "pop in" a dialogue from the right-hand-side of the page where you can enter some information about the new client secret.
Pay particular attention to the "Expires" section. This looks like fertile grounds for future foot-shooting opportunities. For now, just remember that at some point your secret will expire.
It looks like the maximum valid duration is 2 years, so hopefully that will give you enough time to complete this tutorial.
Click "Add" to create the client secret.
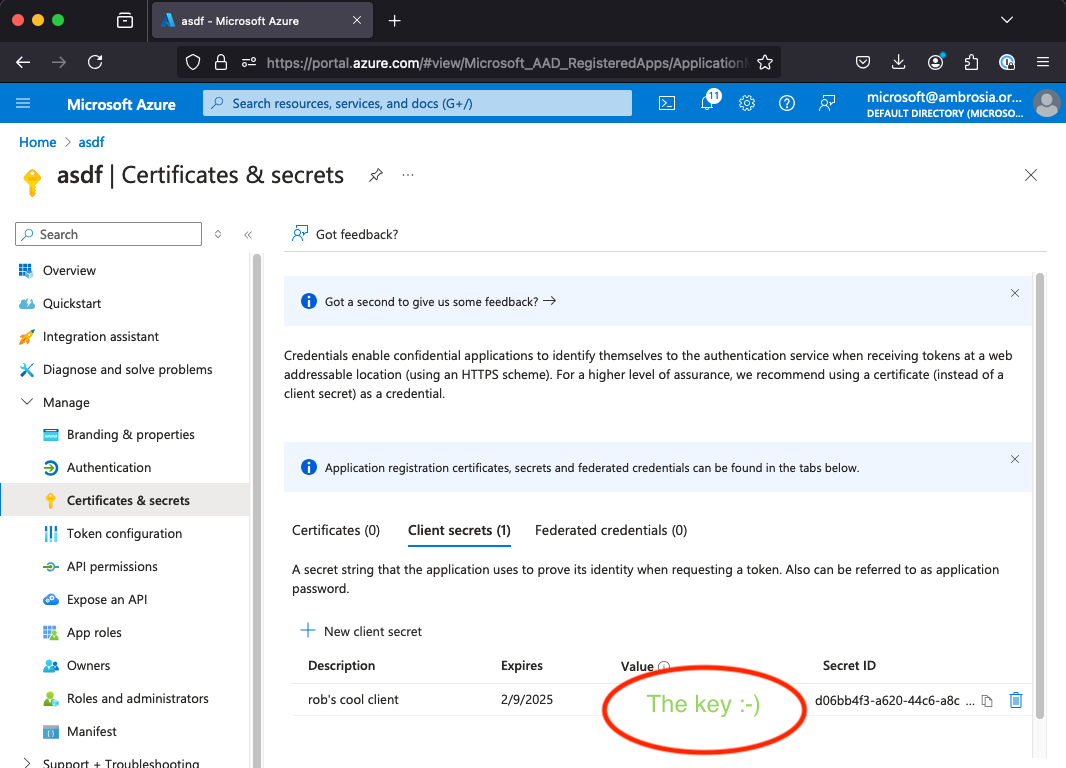
Now from the list of client secrets you can see both the Client ID and the Client Secret. Make a note of them in your copy book.
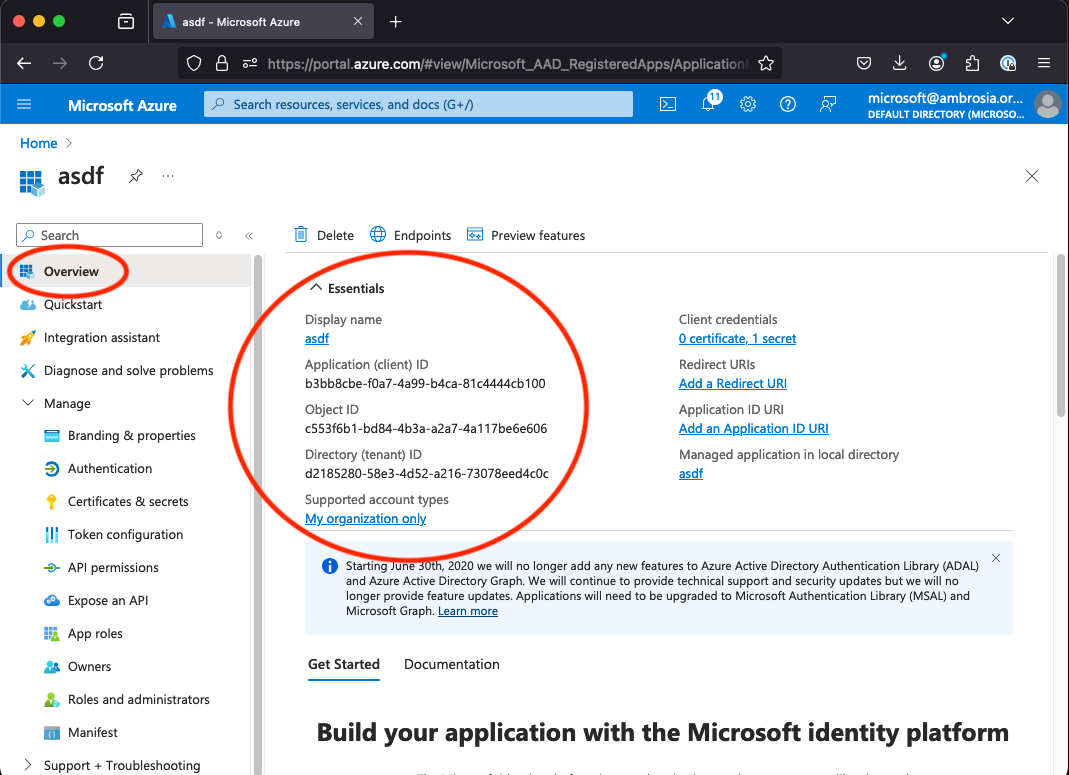
There is one other piece of information that you'll need to communicate with the Graph API using this client which is the Tennant ID of your tennant. You can see that by navigating to the "Overview" of Entra ID ("Home" -> "Entra ID" -> "Overview").
Now we're ready to talk Graph!
Previous, Crash Test Dummies (users and groups) | Next, Graph API the easy way (python code)