Previous, introduction | Next, My First App Registration
Clueless at the Portal - Crash Test Dummies
Initial user and group configuration for testing.

You want some users, and some groups. Put some of the users into some of the groups.
A sensible set of demo users might look like this:
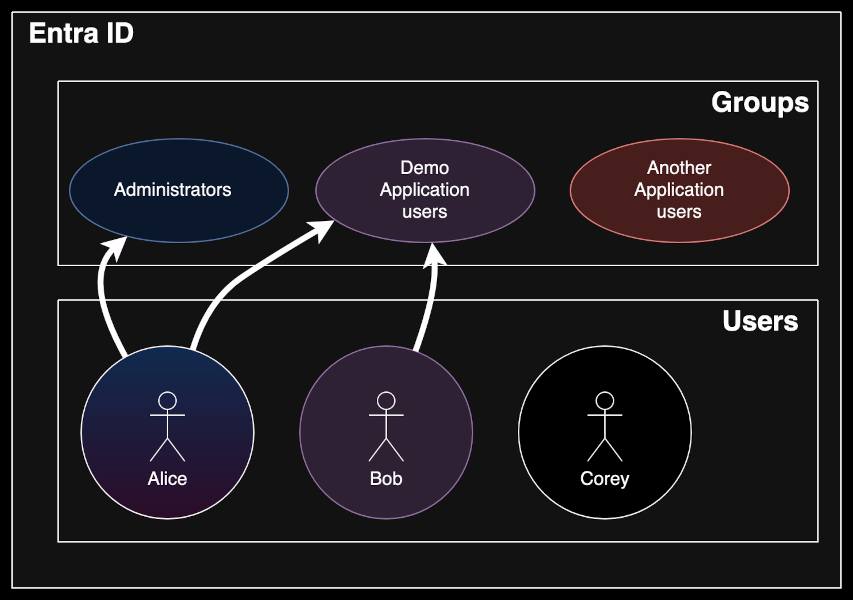
Here we have three users, called Alice, Bob, and Corey.
Corey is not in any groups, they just exist in Entra ID as a user.
Bob is in the "Application Users" group. This represents our intention to grant Bob access to a specific application.
Alice is in the same "Application Users" group as Bob. But Alice is also a member of the "Administrators" group. So Alice will be granted access to the same application as Bob, but will also be given a set of administrator privileges, perhaps within that same application.
There is another group called "Another Application Users" that does not include any users currently. So, nobody can access this other application, whatever it might be.
Pay the piper
Start by buying an Azure subscription from Microsoft. You'll probably have to give them some credit card details. Get the cheapest thing you can, ideally it should cost nothing or very close to nothing if you aren't runnning anything in it.
If you go to buy it and find that it costs you $50/month you are trying to buy the wrong thing. In particular, you don't need anything with the term "365" in the name (although if you already have a 365 subscription, all this Entra ID stuff should be included). If you're offered "Azure AD B2C" don't be tempted, you just want "Microsoft Entra ID".
A couple of caveats
You don't really want to be clicking around in a web site as superuser to configure this stuff, we both know that.
The first part of that ("clicking around") is ungenerously referred to as "ClickOps" (in contrast to DevOps). We're Team ClickOps for these first tutorials.
I haven't looked at how to do this "properly" yet, with APIs and terraform and whatnot, so if I do that it will be like a "part two" of this series. For me, it was easier to discover how to do this by clicking around the web interface, so that's what I'm writing up.
The second part of that ("as superuser") is also kind of interesting. In the organisation where I work, "doing stuff as superuser" isn't really a thing. Instead, everyone has small sets of specific rights that allow them to do what they need to, and no more.
That's a much better way to do things from a security point-of-view (because the potential impact of an account compromise is reduced).
I'm hoping that once I've worked out how to do all this stuff, in a payground tenant that has no value, I'll then be able to go back through it and work out what rights I would have needed to do all the individual actions, and then I can write that up too.
Create a user
There's proably already one user in your Entra ID. I think, by default, you get one that matches the Microsoft Account that you used to buy Azure.
For sanity, we're not going to use that user for testing, so we'll need to create some others.
The users that you create can be called anything you want, just make sure you can tell the difference between them.
I recommend you start by adding one user only, just because you don't want to start to pay for more before you need them. You can follow this entire tutorial with just one user.
It's interesting to experiment with more than one, and put the users in different groups, once you know what you're doing.
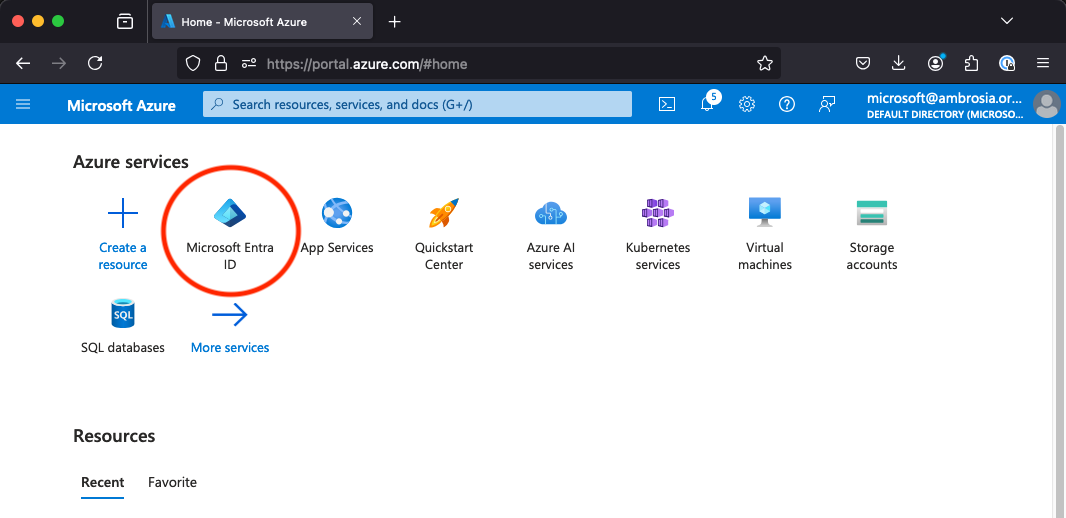
Start by clicking on "Entra ID" in your shiny new tenant.
Take a look at the menu on the left hand side of the screen here.
These are collapsible options, with lots of thing hiding inside them.
If you can't see "Users" on the left-hand-side menu, click on the word "Manage" to expand all of the sub-options.

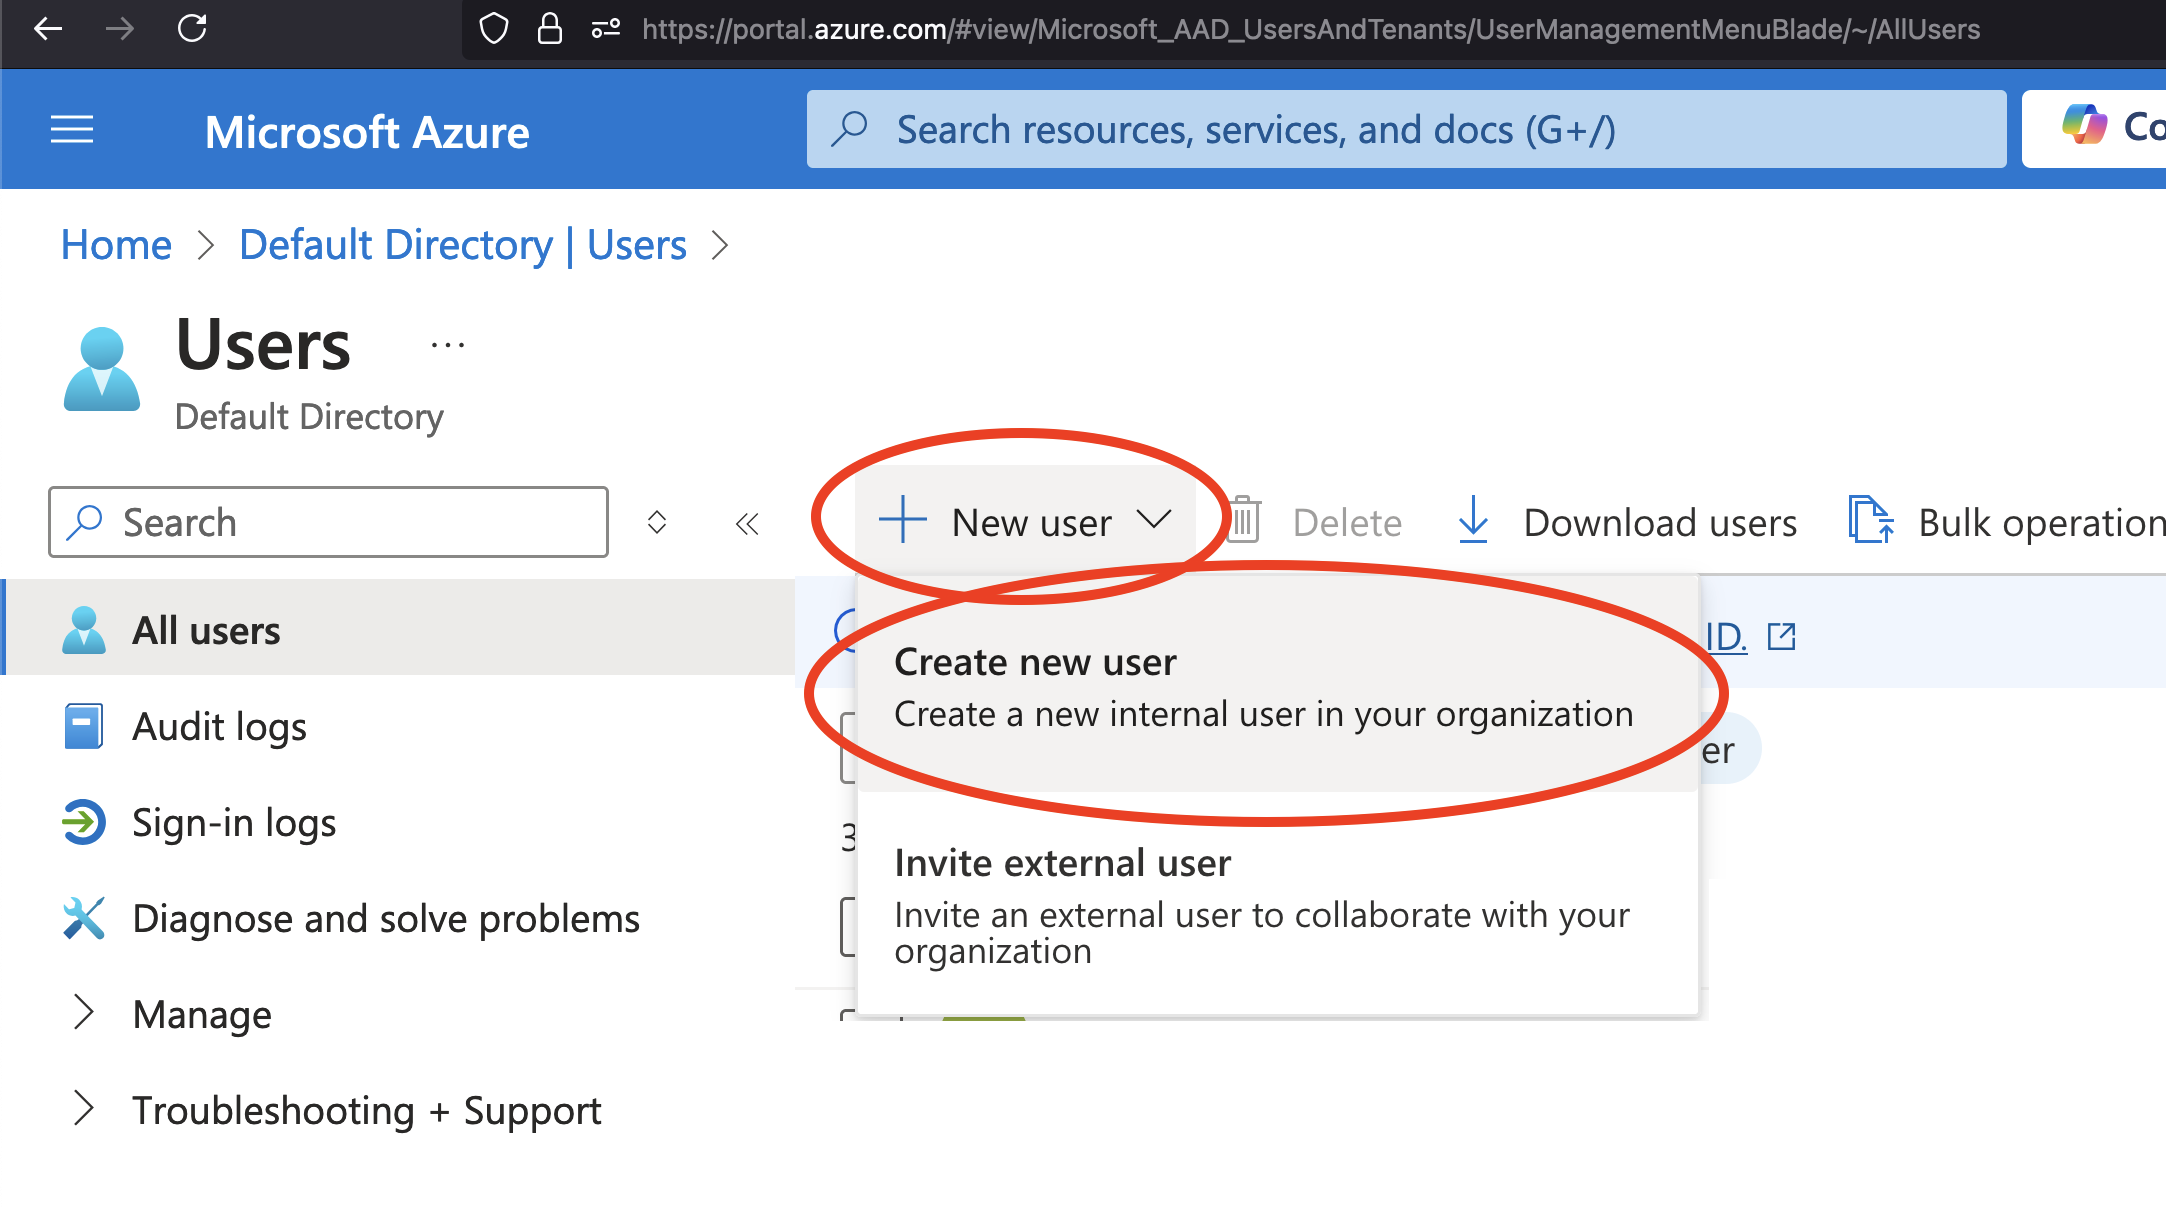
Click on "Users" to visit the user management page.
Click "New" which will expand a sub-menu. From the sub-menu, choose "Create new user"
In the new user dialog, specify a "User Principal Name" for the user. We'll refer to this a lot, so it's common to use the shorthand UPN.
(This UPN is a bit like a "Username". As long as you, the owner of your tenant, make sure that UPNs are unique and don't change, you can treat them as if they were usernames.
In reality, users are uniquely identified by a secret ID that gets created "behind the scenes". That means that if you had an evil or mad Azure administrator, they would be able to change the UPN out from under you.
But the sane thing to do is to treat the UPN as if it is a username, and just not change it during the life of a user. So that's what I'll be doing from here onwards.)
The other thing you need to specify here is a "Display Name" for the user, whether you want to or not.
(You might think that you need to enter a password here, but a default password will be created if you don't, and you can always reset it later.)
Once you have entered a UPN and a Display Name you should be able to click "Review and create".
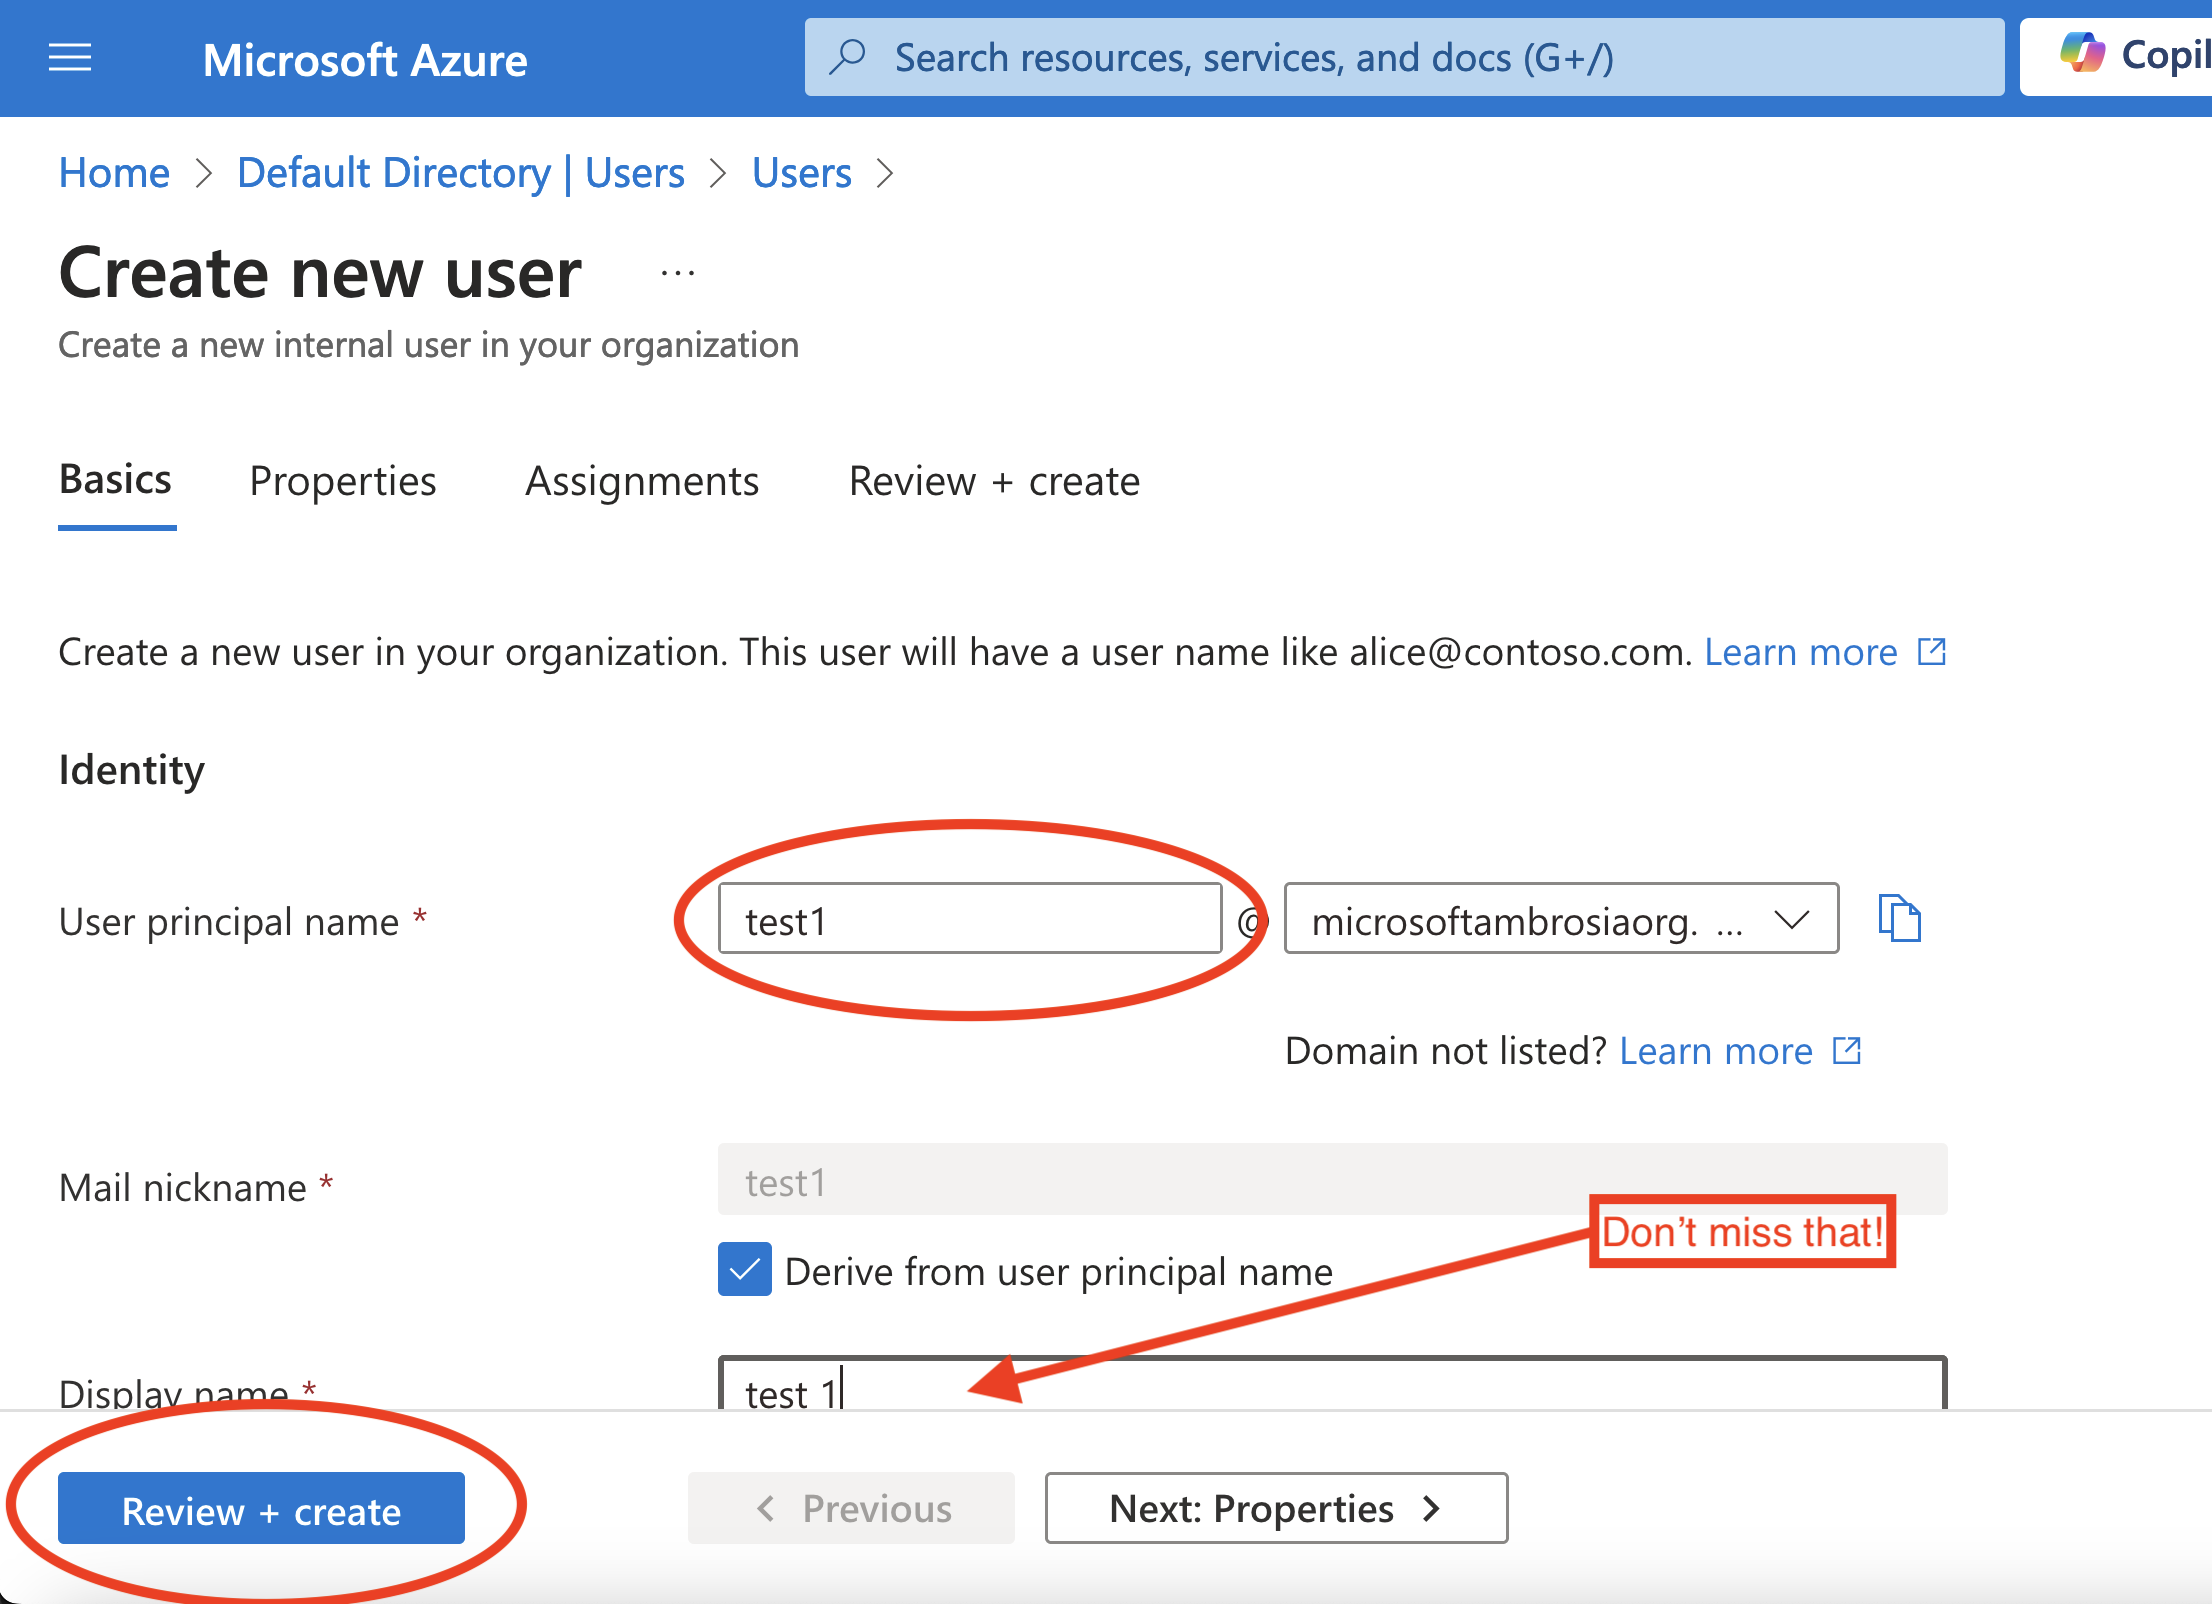
You have one last chance to check you didn't screw that up before you click "Create", but you probably didn't screw it up, so click "Create".
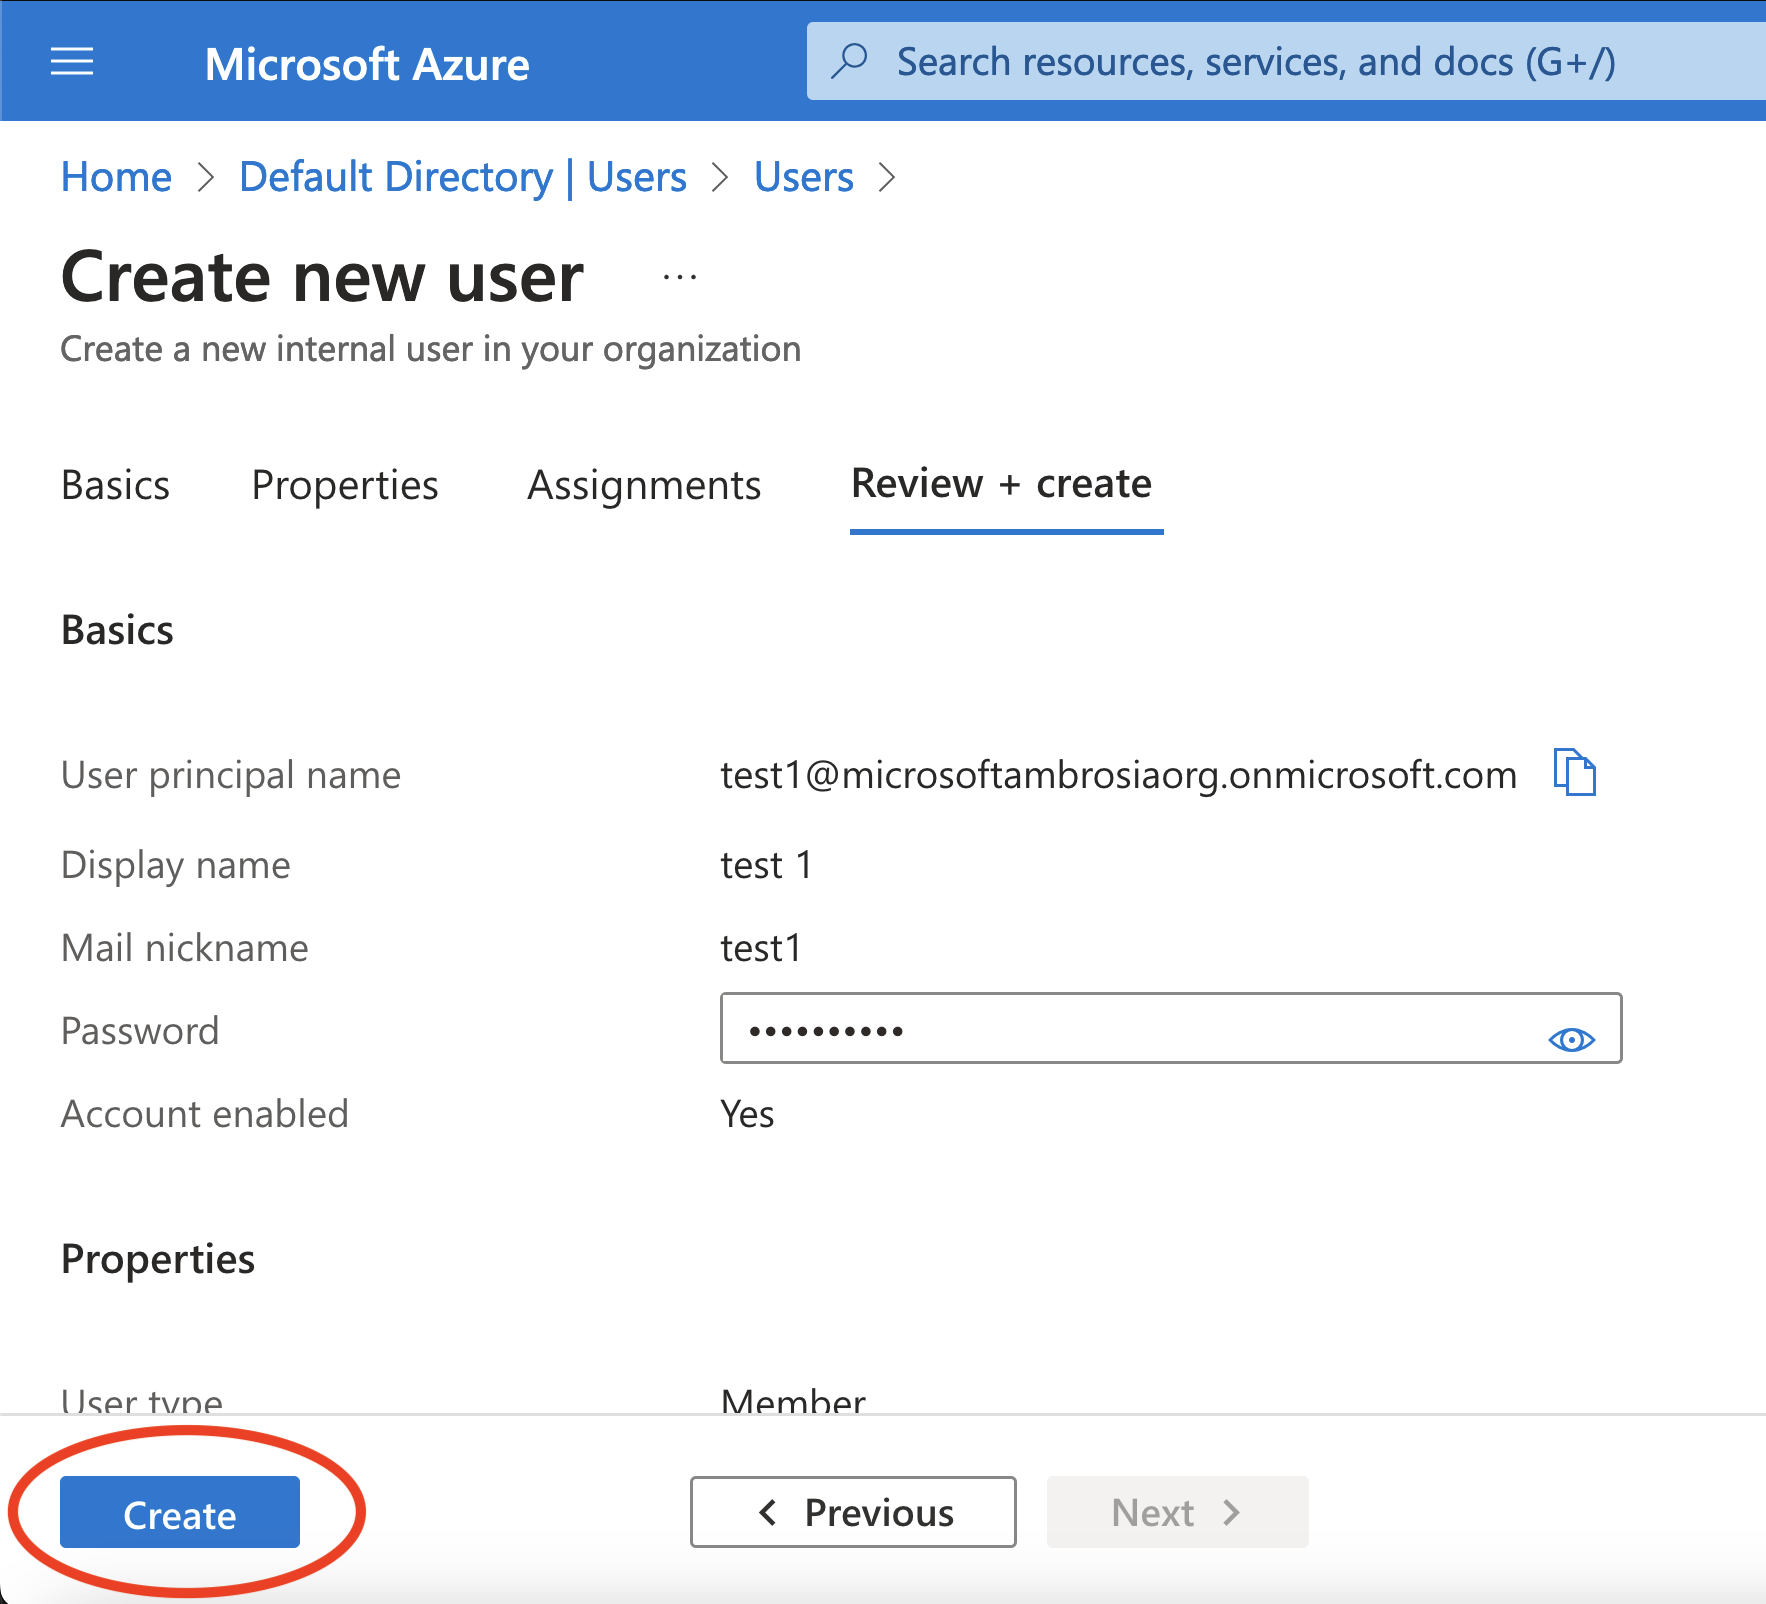
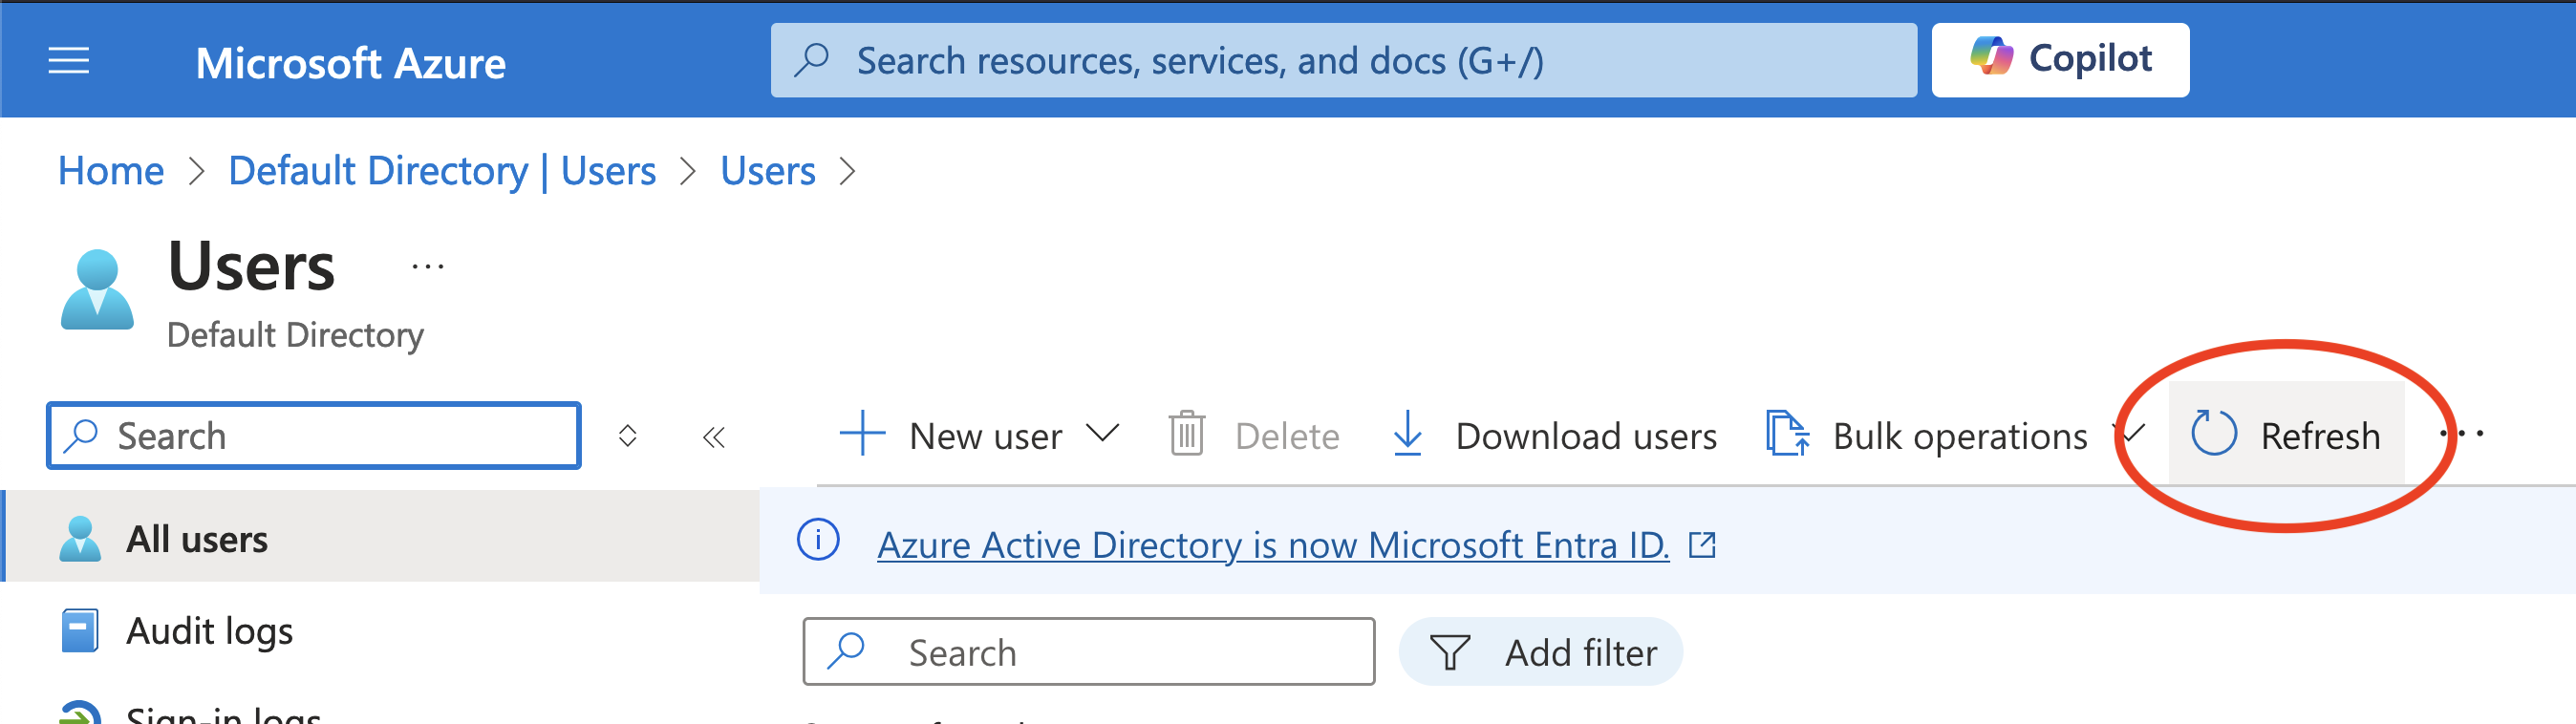
You'll now be returned to the list of users. Your new user probably won't appear here until you click "Refresh".
Create a group
We want to extract data from Azure about group memberships, so we'll also create a group at this stage.
If you're rich, you can create lots of different groups and users and set up a static set of test data that never changes. It's nice and easy to test stuff repeatably this way.
If you're poor, just create one group, and add/remove your one user to/from that group as needed.
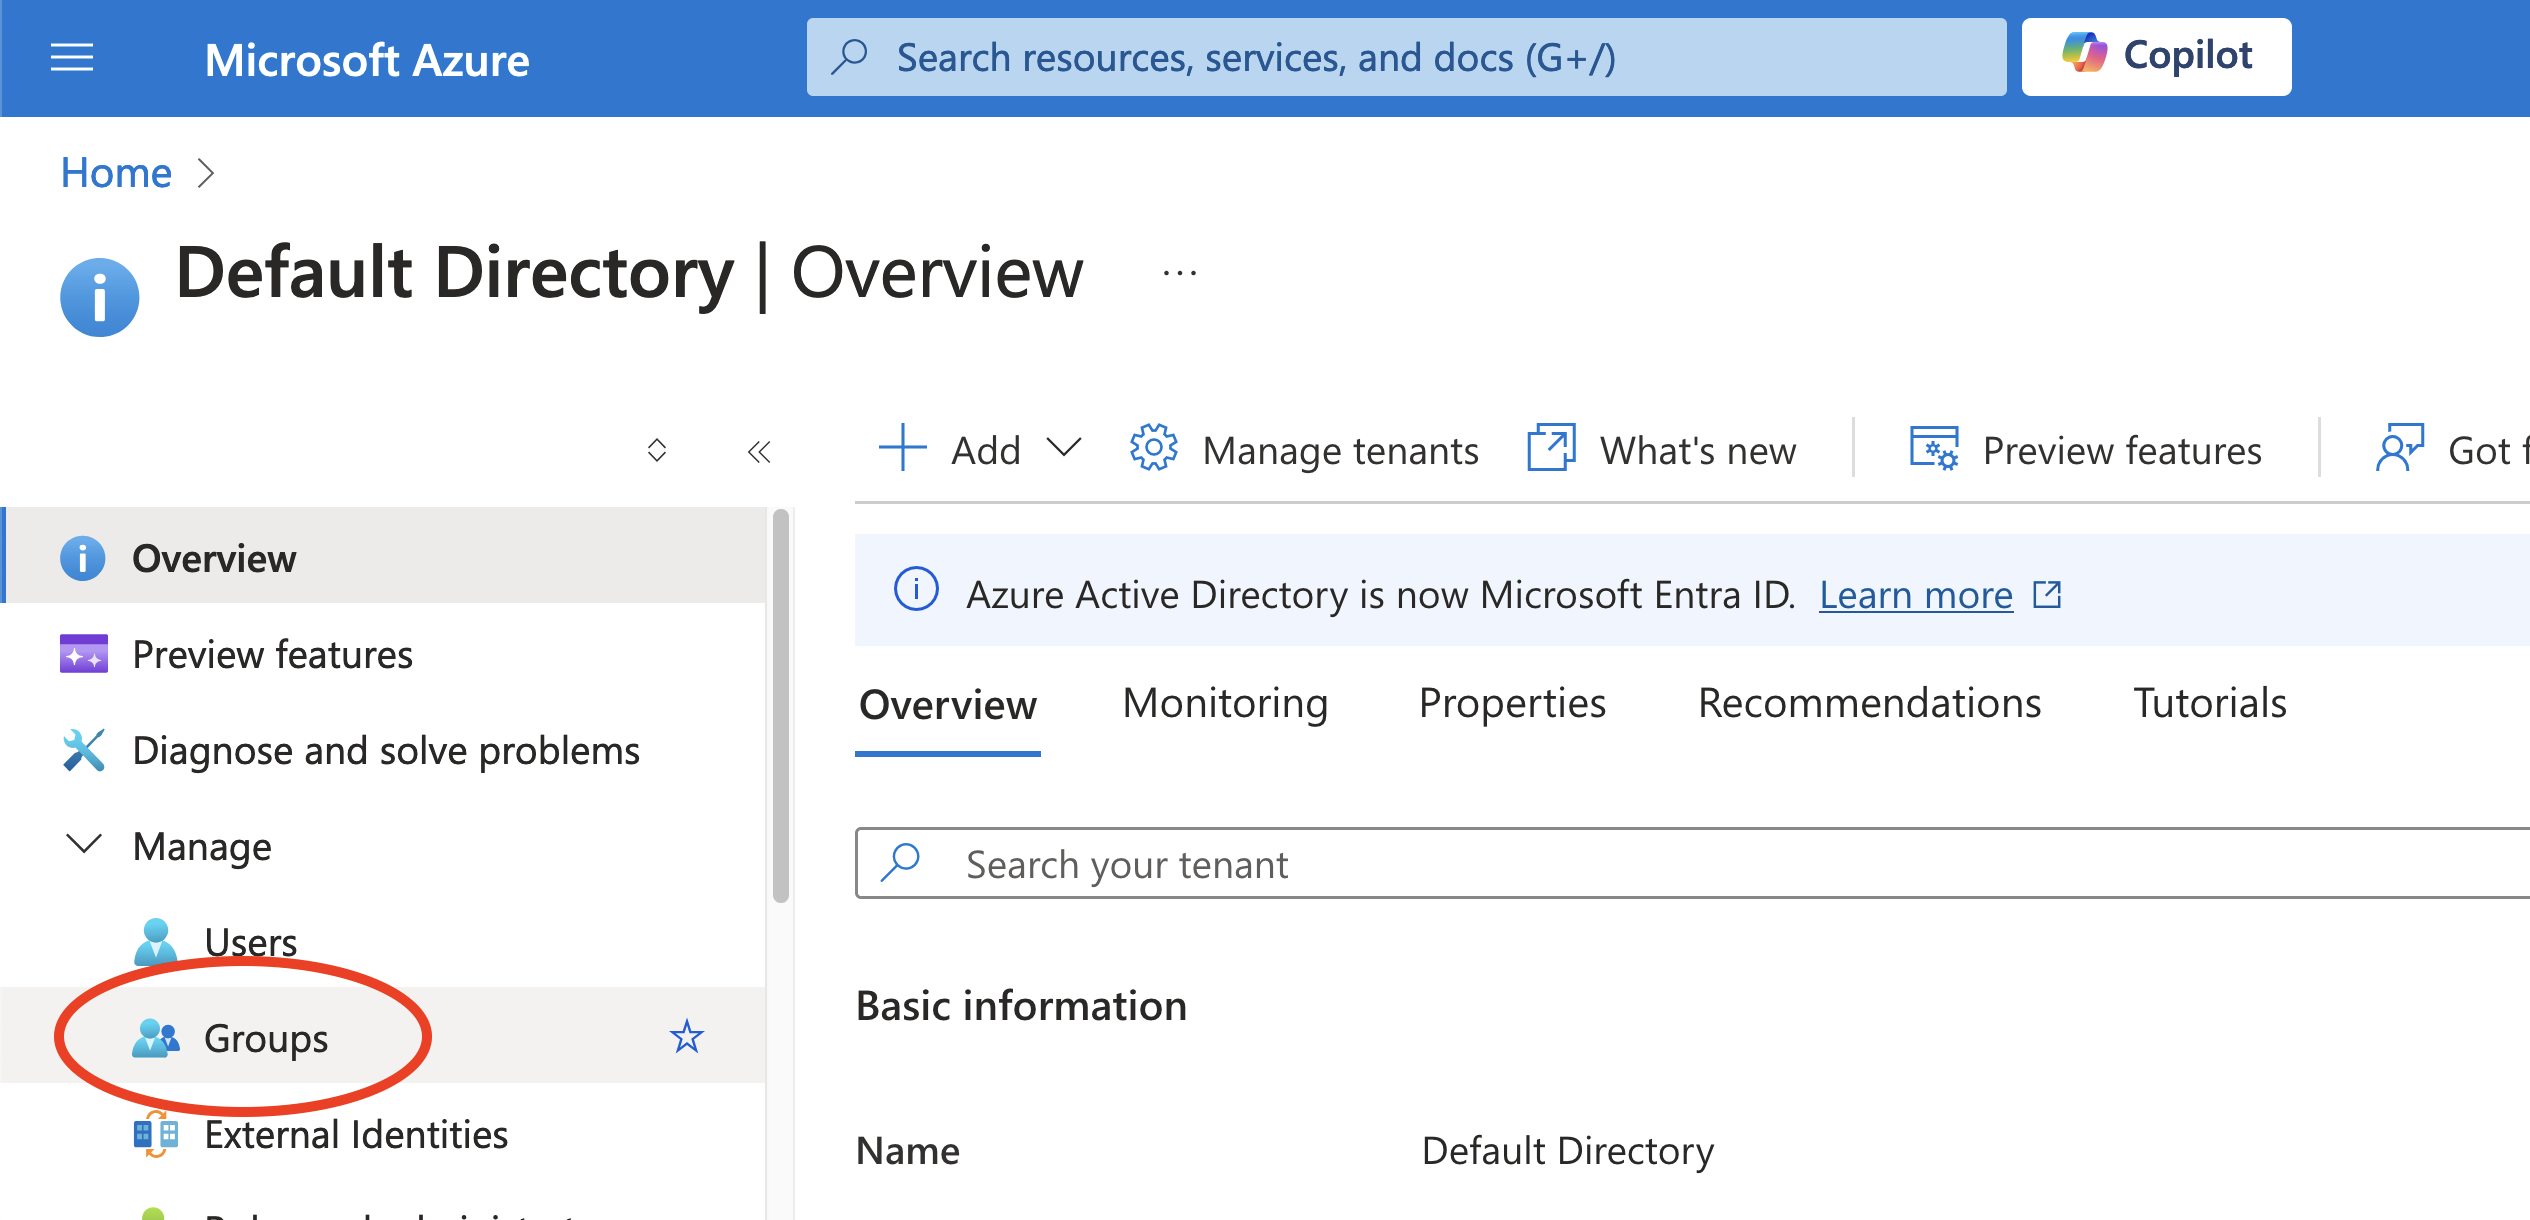
Click "Home" or otherwise get to the front page of the portal, then "Entra ID" to get b ack to the Entra ID home page. Then, below where you clicked "Users" in the previous se ction, click "Groups".
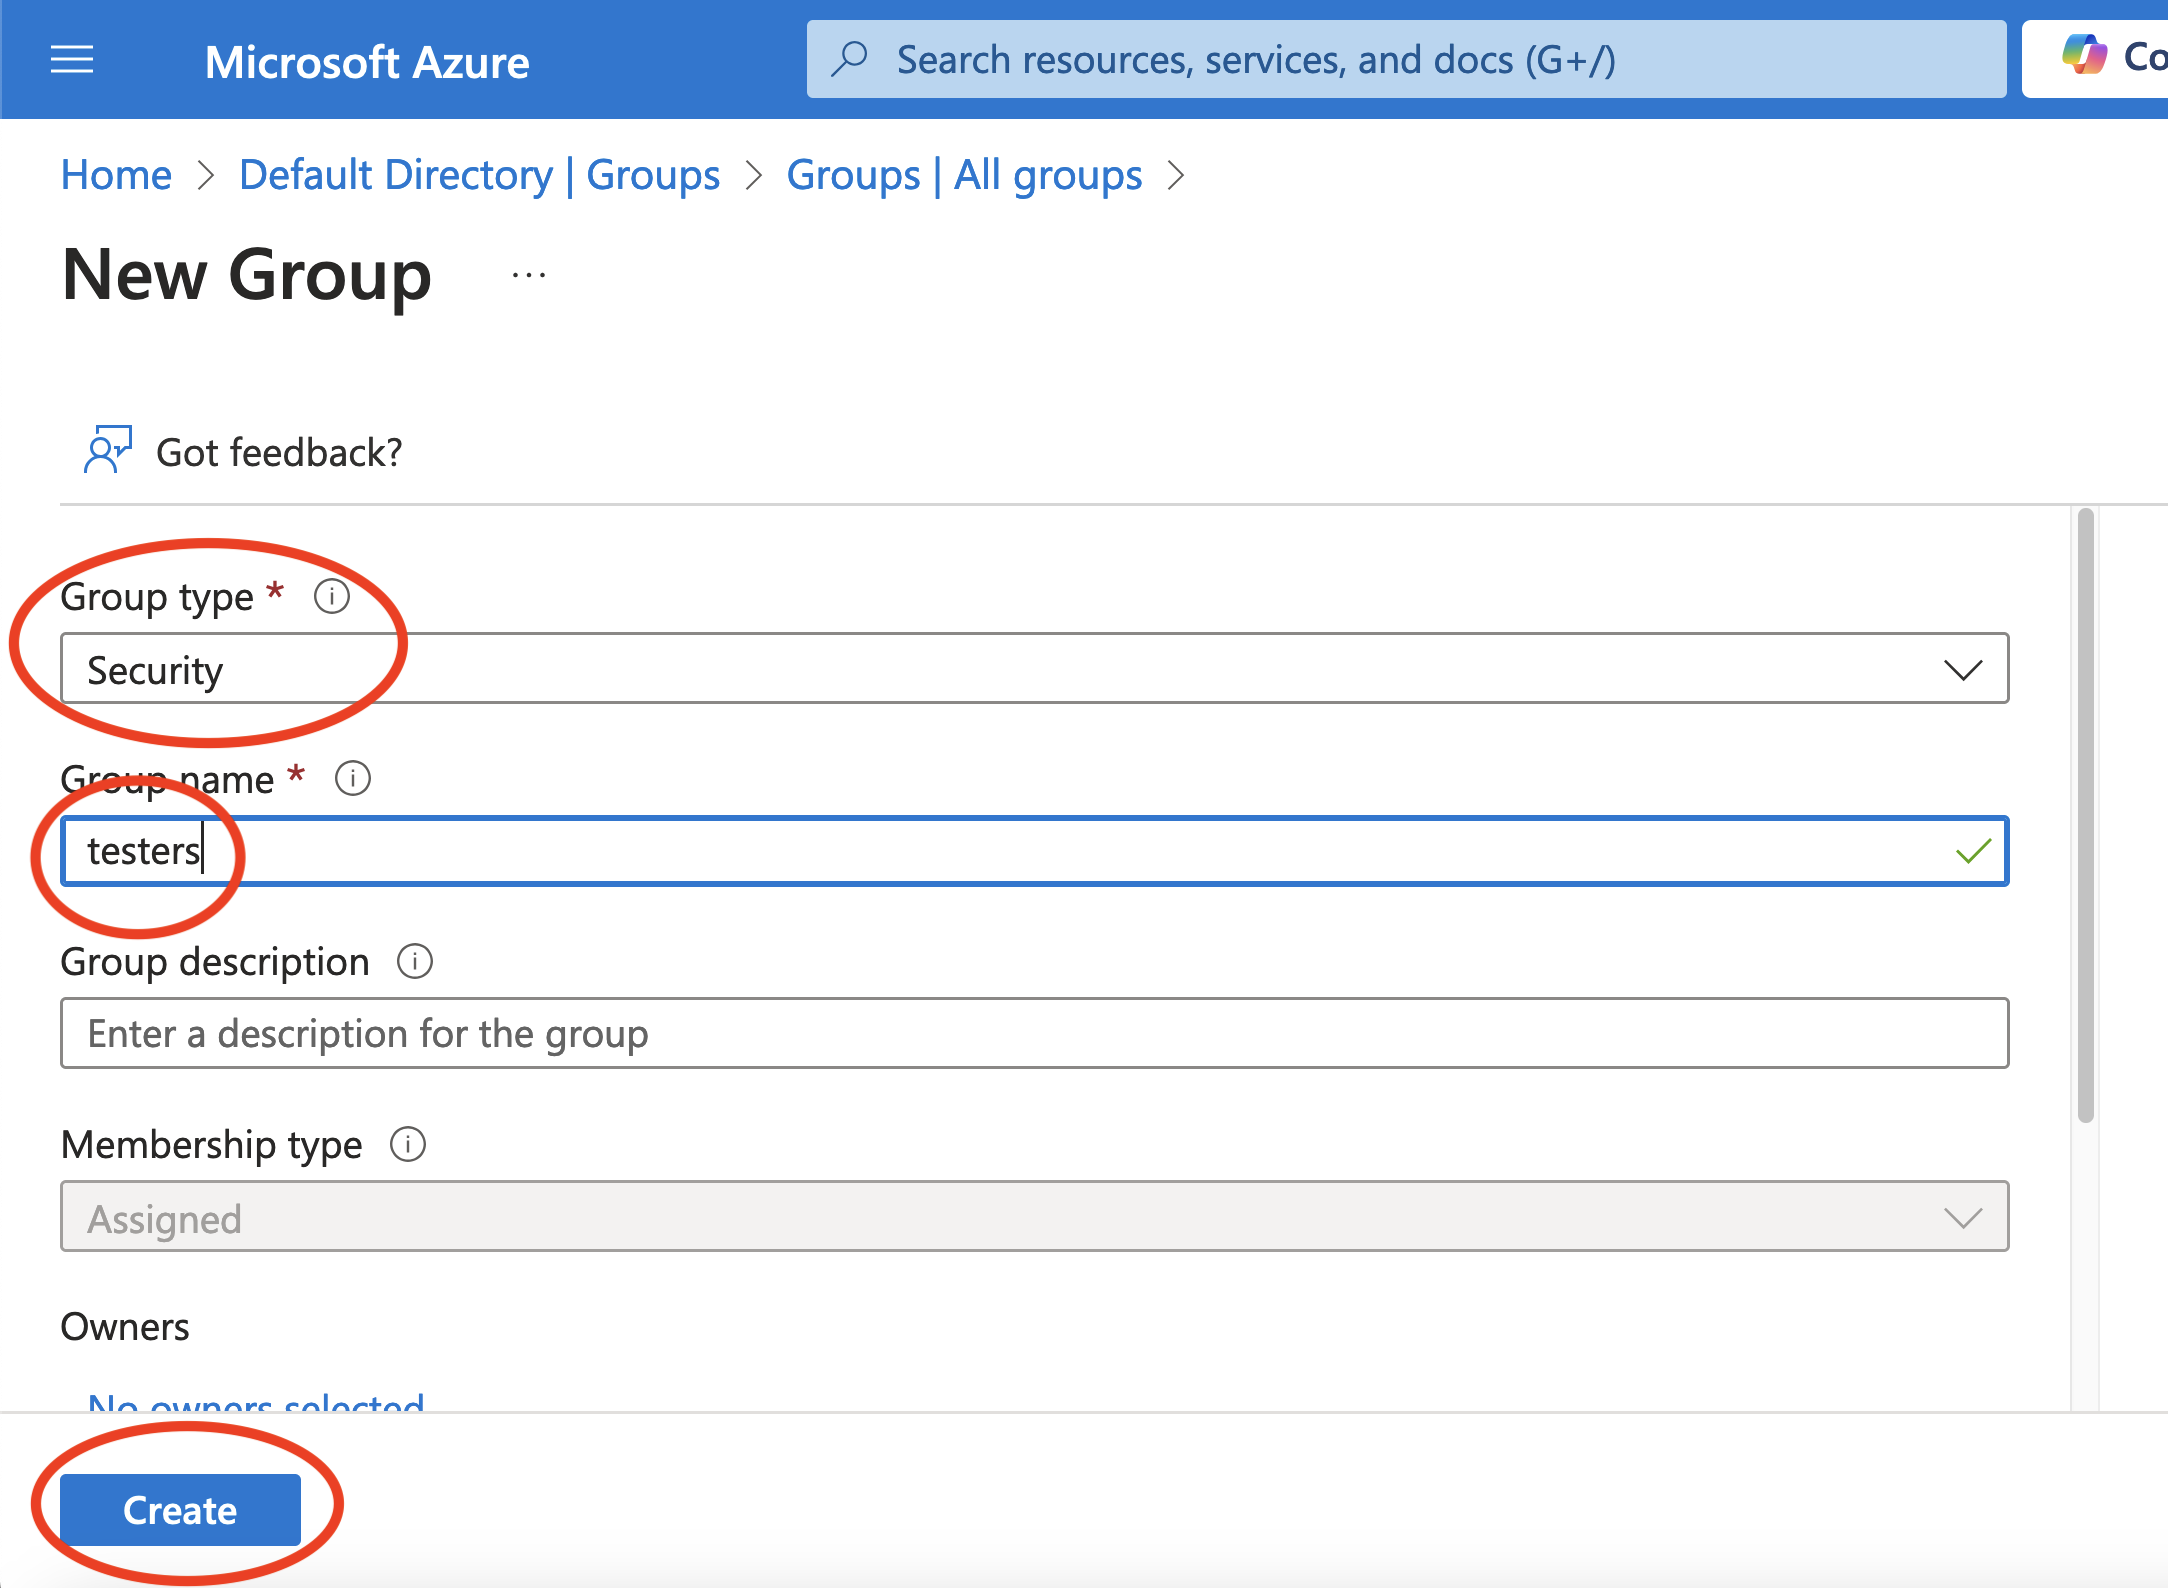
Click to create a new group.
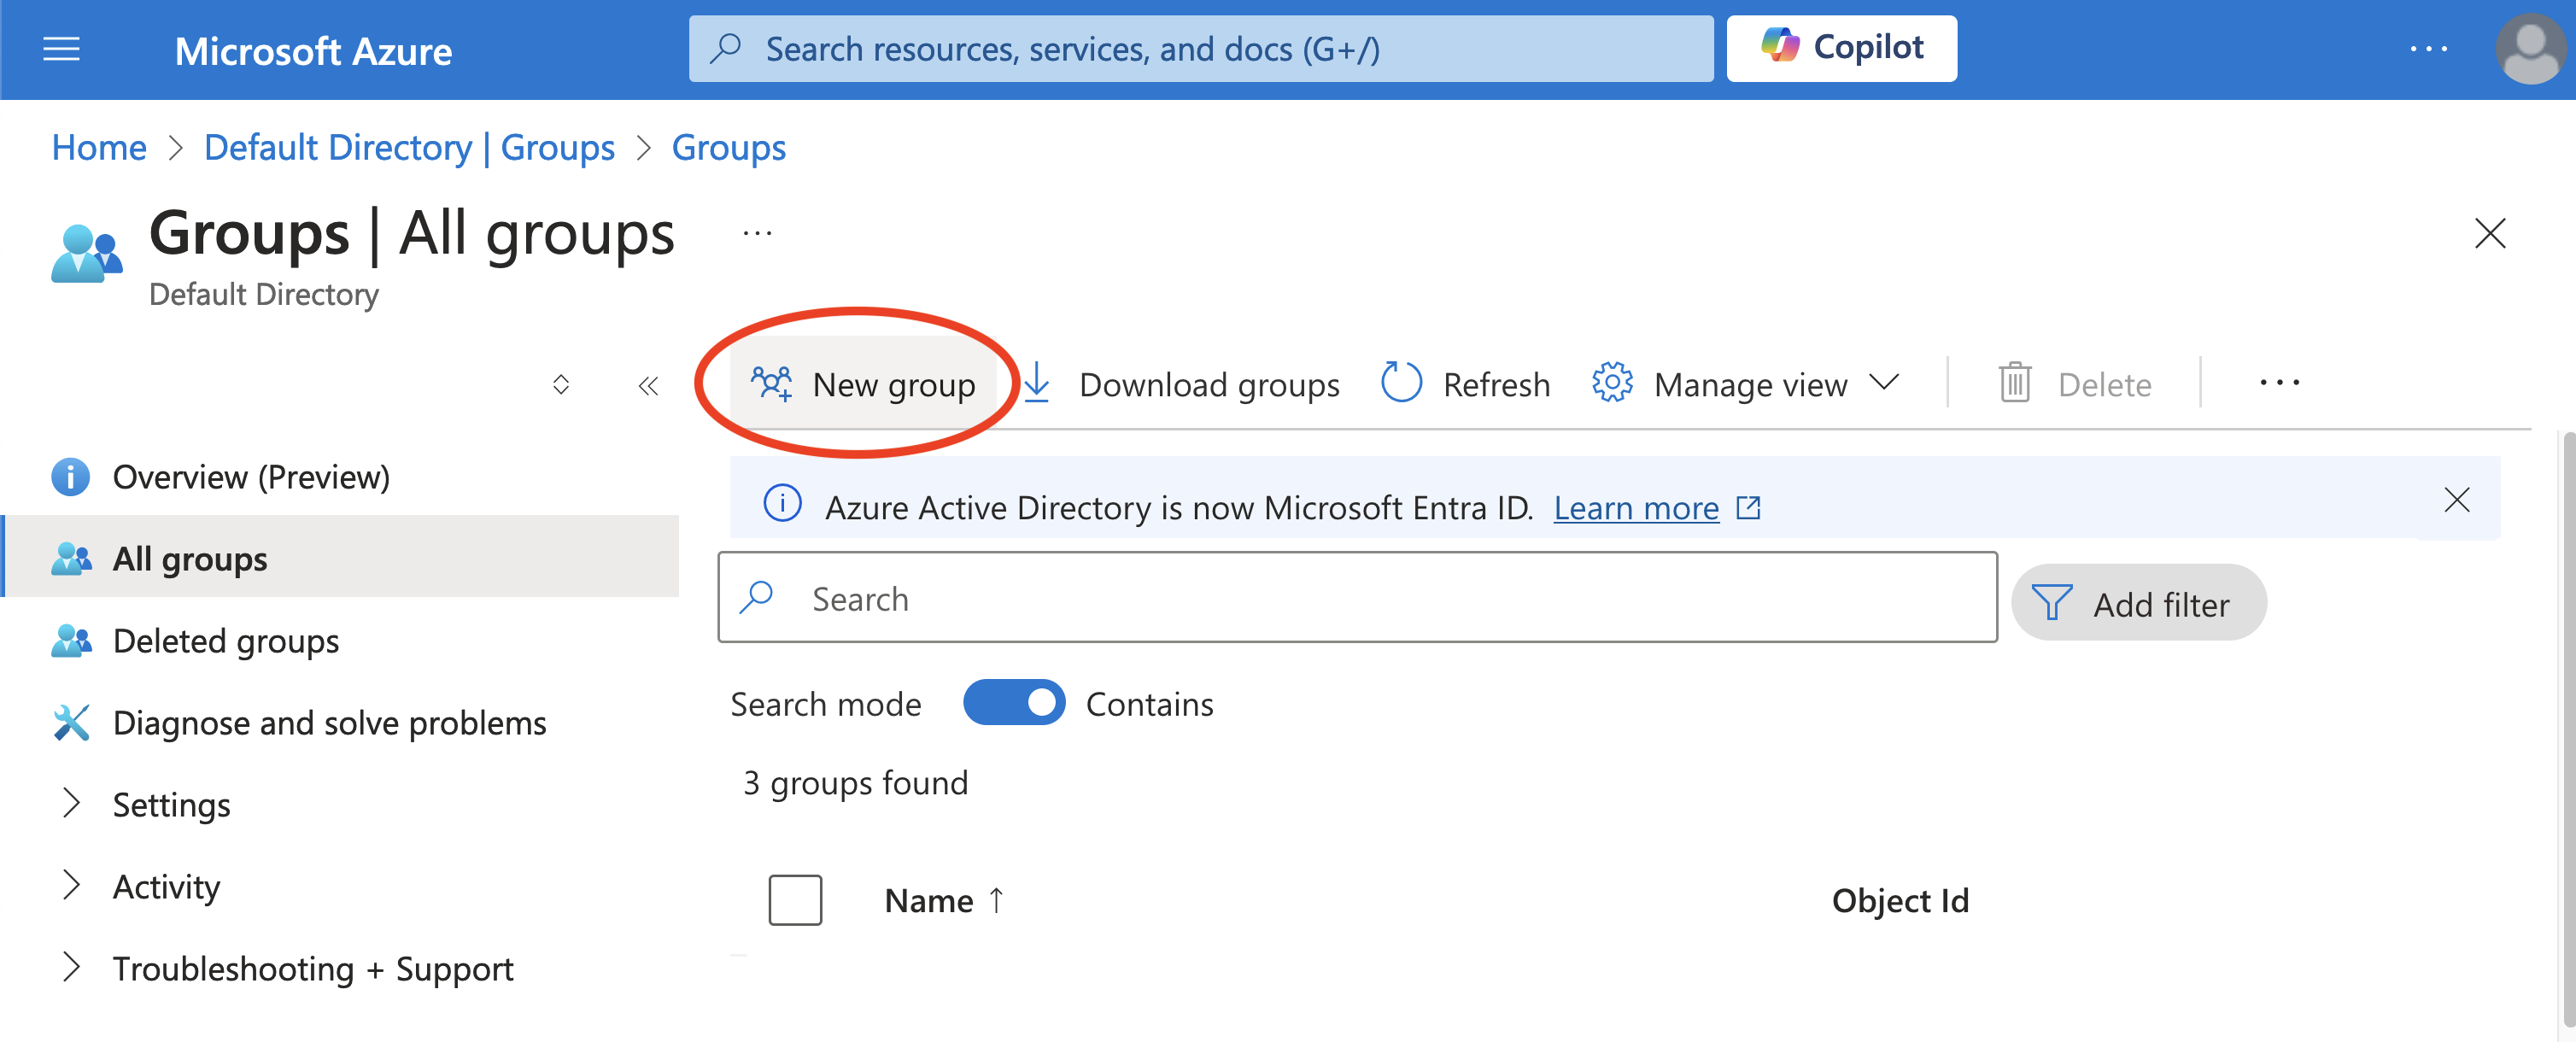
The option you need to pay attention to here is that your group should be a "Security" group, not a "365" group or any other thing. Besides that, just make sure you give your group a descriptive name.
As when adding a user, you'll probably need to "Refresh" to see your new group in the list.
Put some of the users into some of the groups
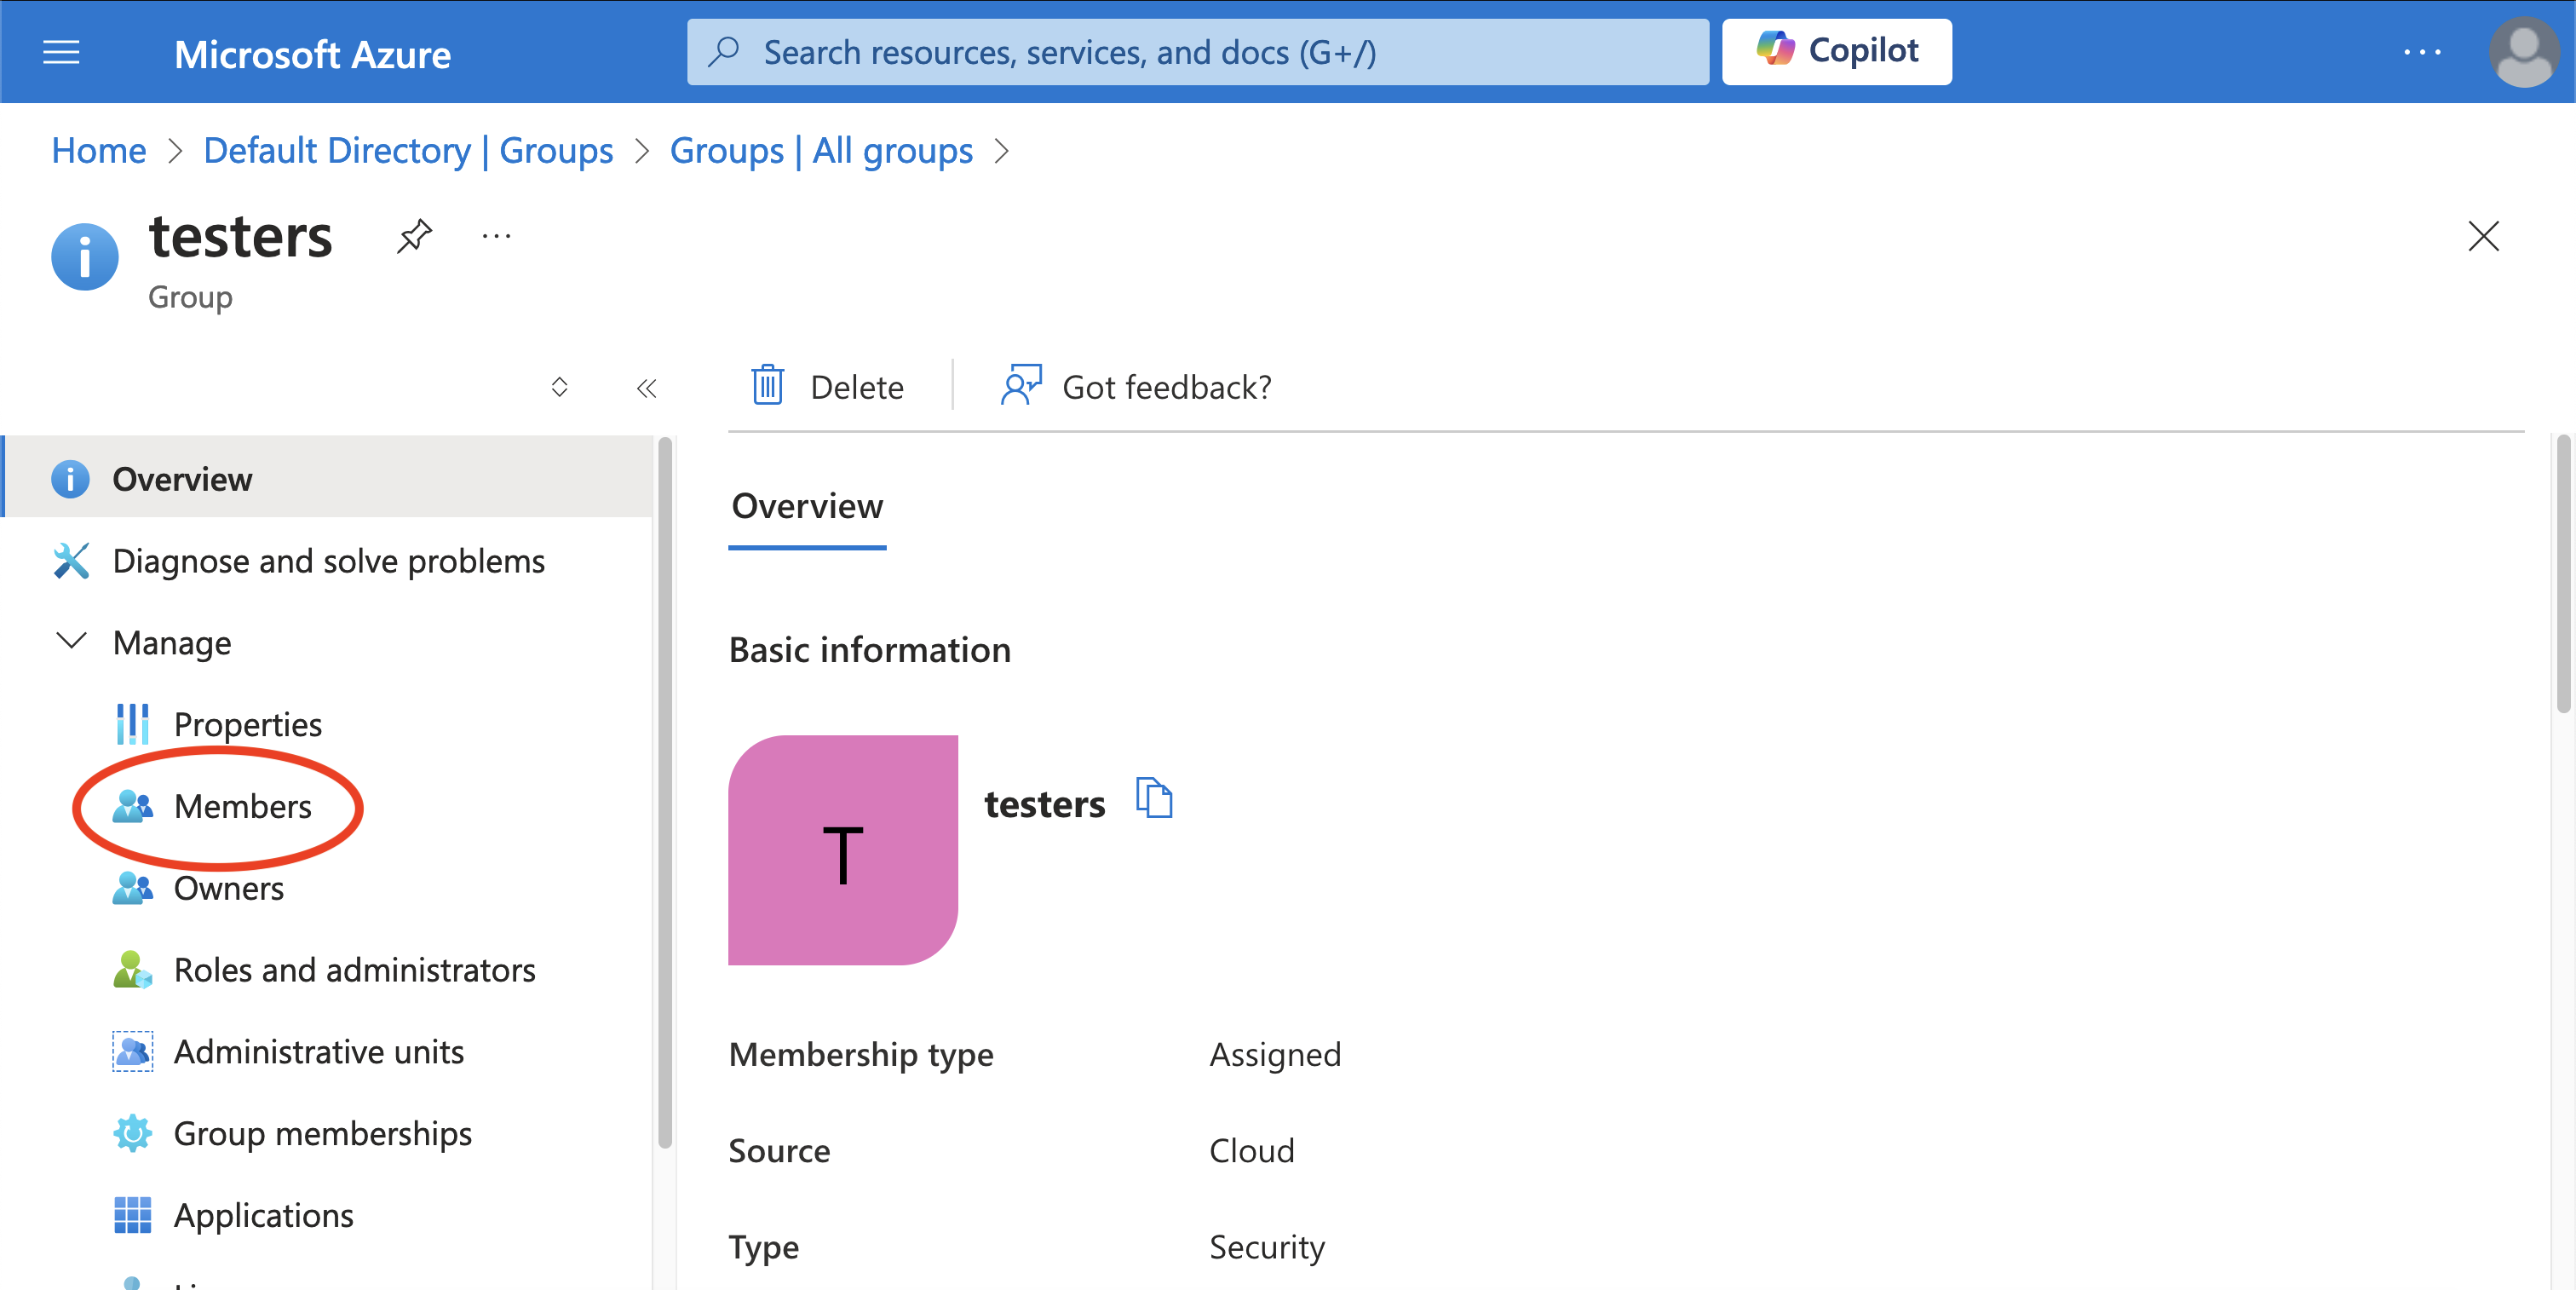
Again, navigate back to the list of Groups within Entra ID. You should see your group in the list (perhaps after clicking "Refresh").
Click the name of the group.

From here we want to modify the group membership so click "Members" from the left-hand menu.
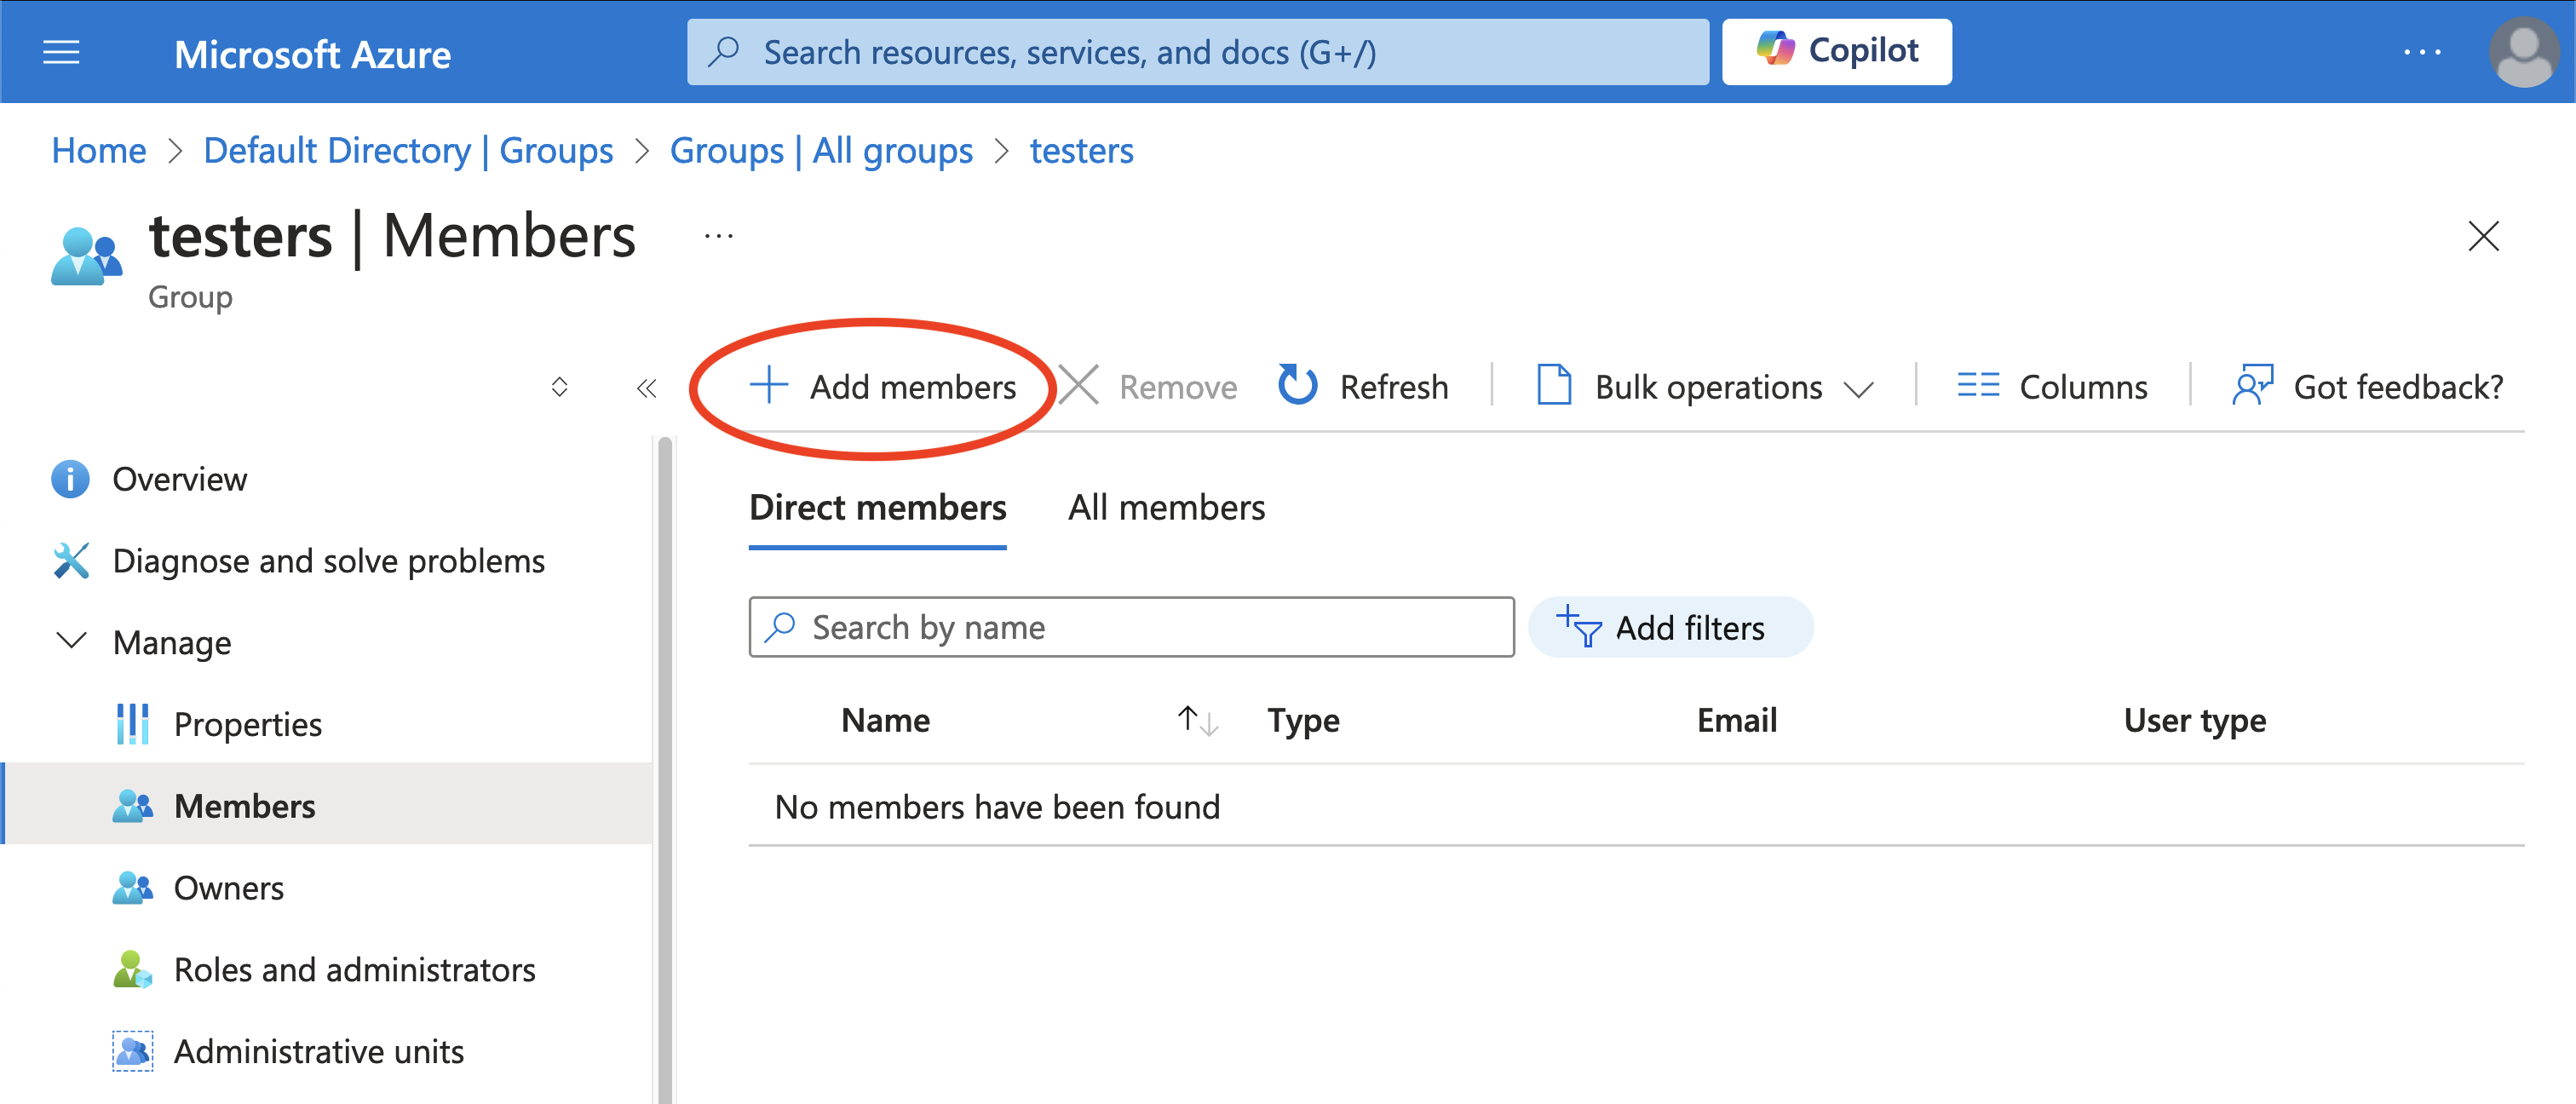
If the group was just created, the list of members should be empty. Click "Add members" to add a member to the group.
A list of all of the possible things you can add to the group will appear. It's surprisingly large and includes lots of things to ignore!
Either scroll down the list to find the user you want to add, or use the search box and filters to narrow things down a bit first. When you've found the user you want, click to check the checkbox next to their name and click "Select"
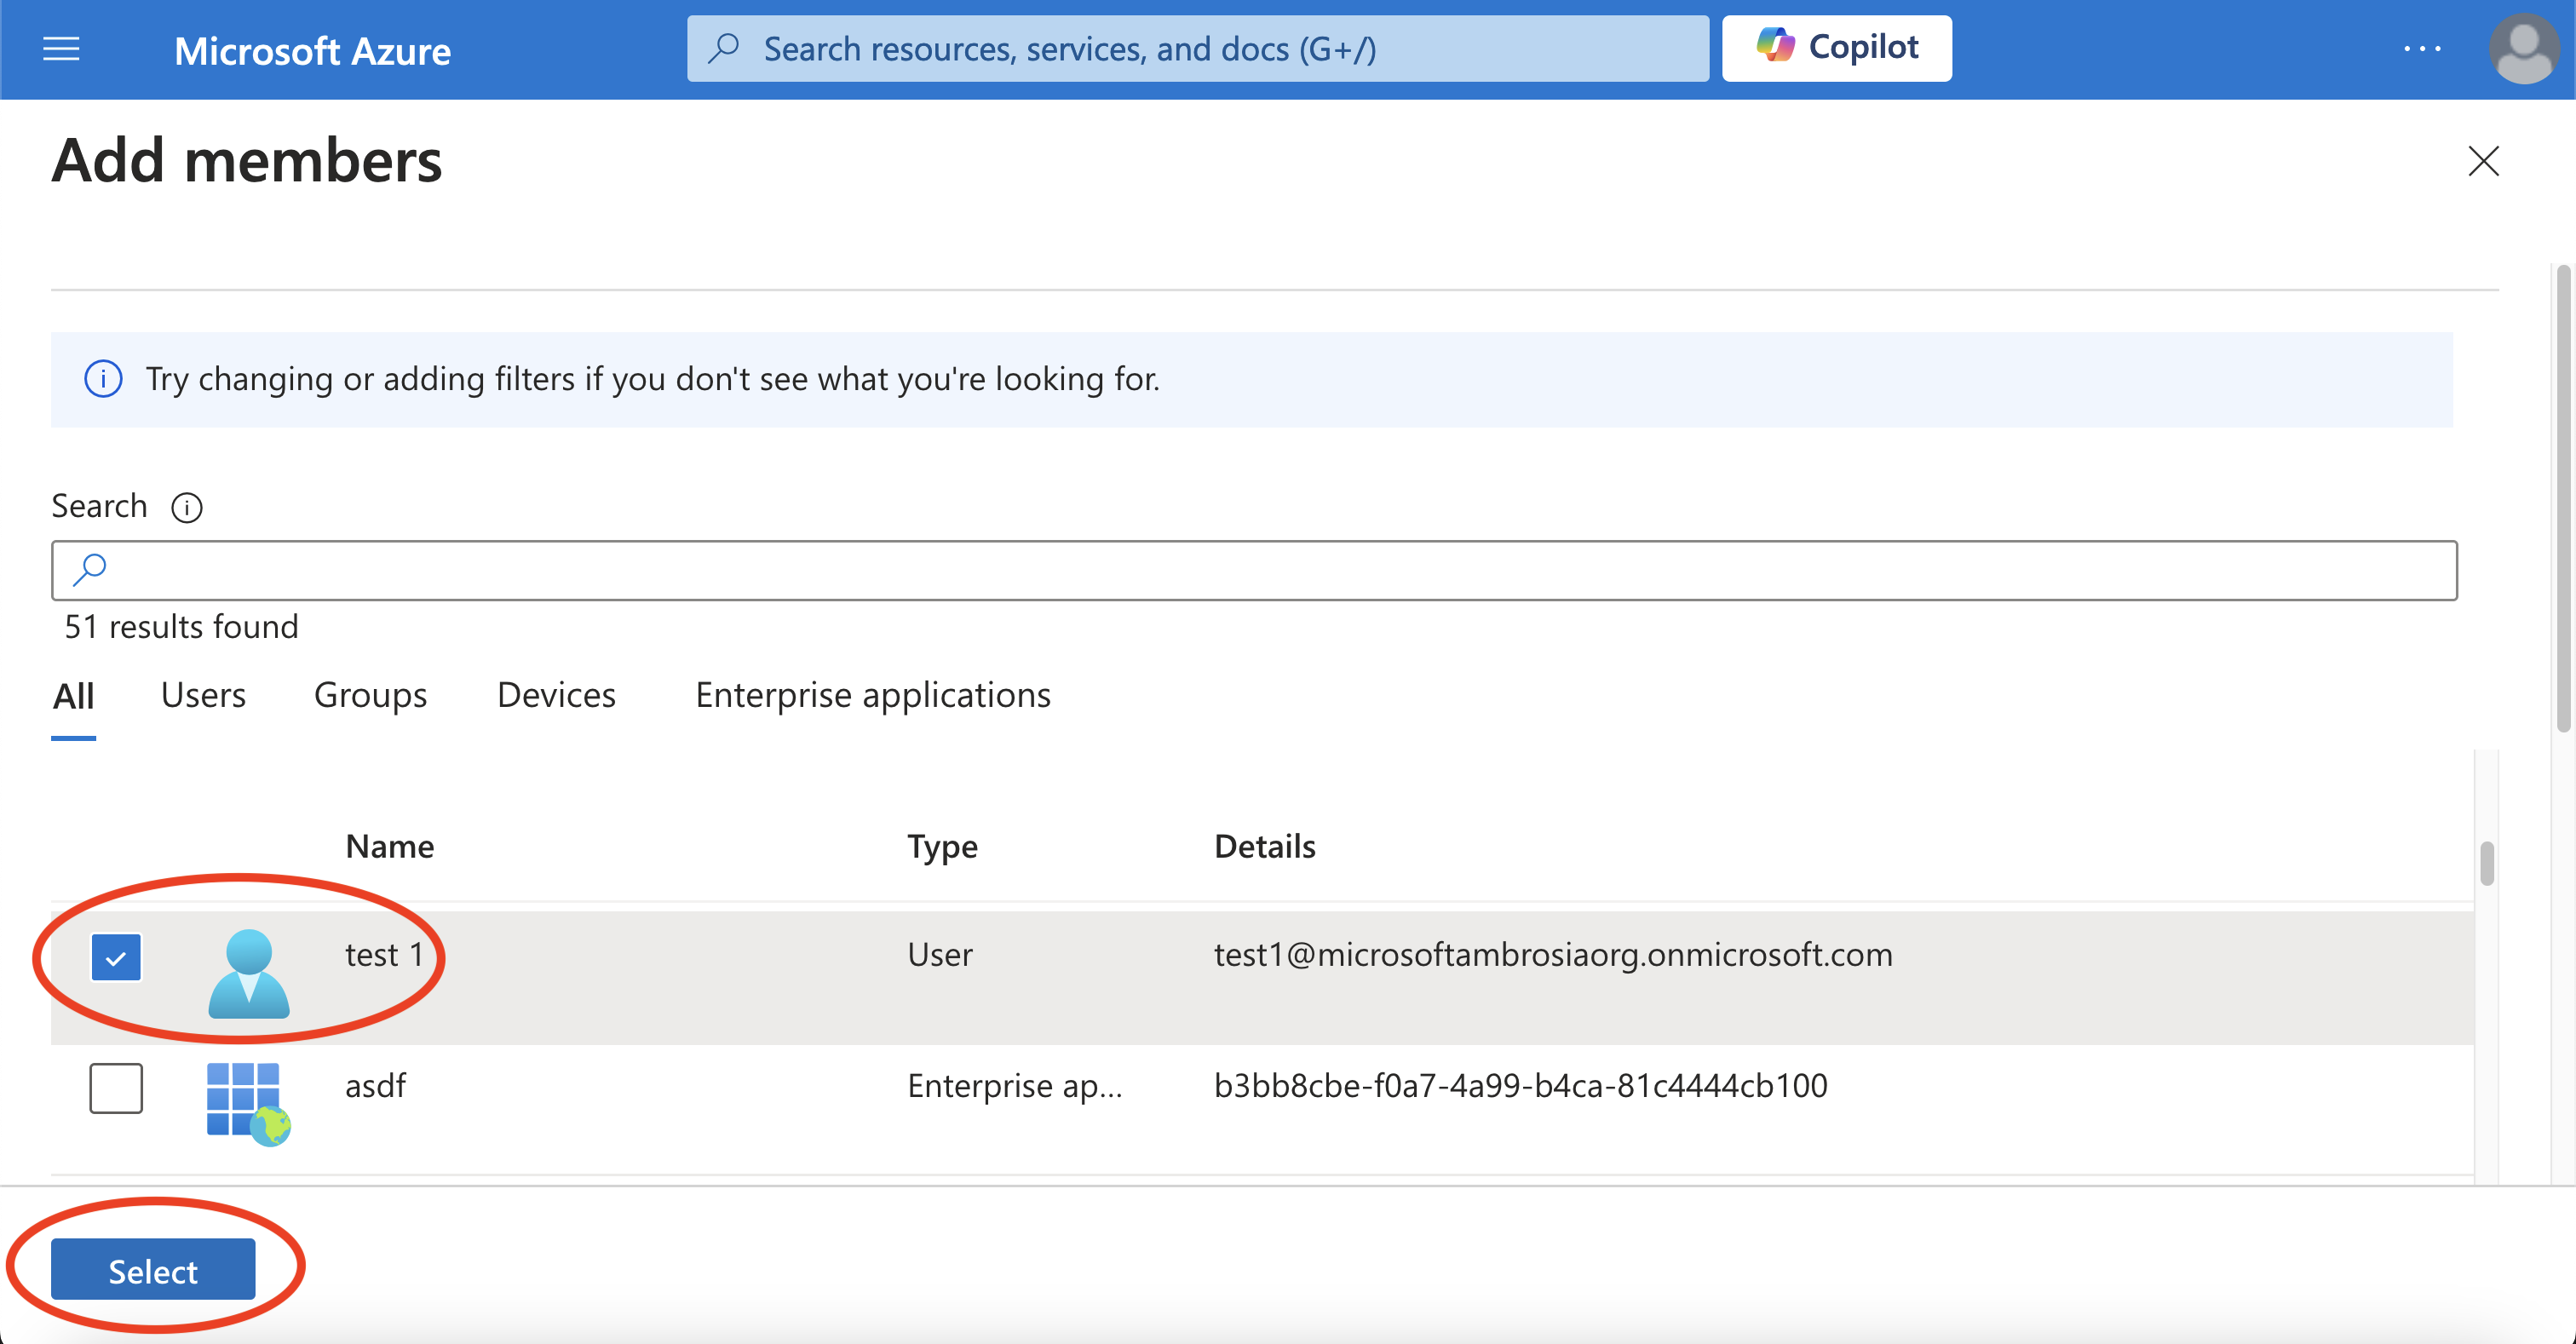
The group's membership will be updated to included the user.
As long as you have at least one user in one group you should be able to follow along with the next few tutorials.